How to Change Clutch Master Cylinder
To change your clutch master cylinder, first ensure your vehicle is parked safely with the engine off. Locate the clutch master cylinder near the firewall and clear access around it for easy handling.
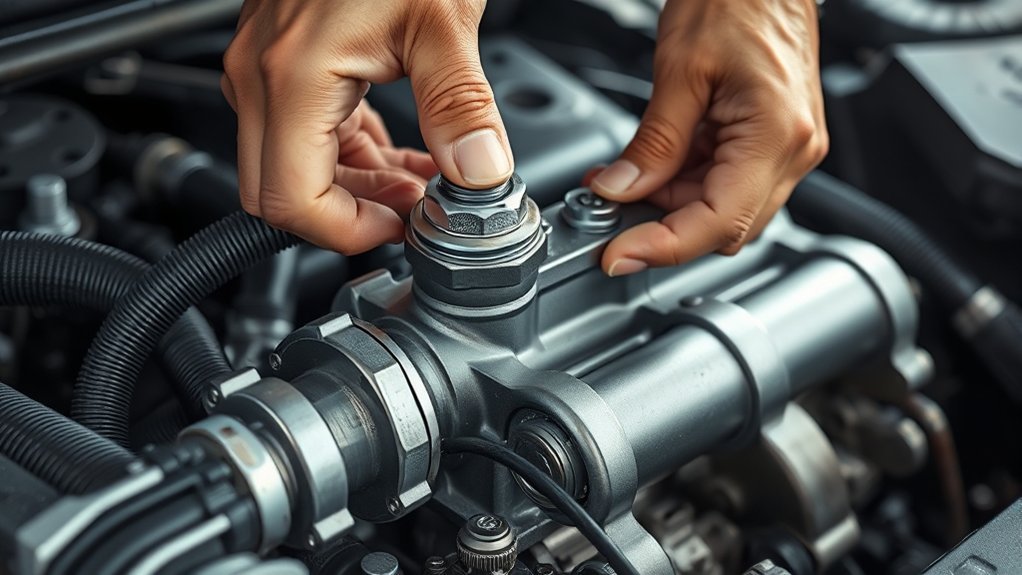
Next, drain the old fluid using a syringe and a catch container. Disconnect the hydraulic lines and remove the mounting bolts carefully. Then, take out the old cylinder without damaging surrounding components.
Install the new clutch master cylinder with proper alignment. Secure all fittings tightly and reconnect the hydraulic lines, making sure there are no kinks or leaks.
Finally, bleed the system thoroughly to remove any trapped air. Test the clutch pedal for proper responsiveness. Following these steps will ensure smooth clutch operation—detailed instructions for each phase follow for success.
Signs Your Clutch Master Cylinder Is Failing
How can you tell if your clutch master cylinder is failing? Key indicators include a spongy or soft clutch pedal that doesn’t return properly, difficulty in shifting gears, or clutch pedal sticking to the floor. You might also notice fluid leaks near the firewall where the master cylinder mounts.
While inspecting, ensure your drive belt is intact and properly tensioned, as a worn belt can indirectly affect clutch performance. Additionally, poor wheel alignment won’t directly cause clutch issues but may indicate broader vehicle maintenance neglect, which could correlate with hydraulic system problems.
If you detect these symptoms, it’s crucial to address them promptly to avoid damage to the clutch slave cylinder or transmission components. Recognizing these signs early prevents costly repairs and ensures safe vehicle operation.
Tools and Parts Needed for Replacement
Noticing symptoms like a spongy clutch pedal or fluid leaks means it’s time to replace the clutch master cylinder. For effective car care and engine maintenance, gather the essential tools and parts before starting.
A spongy clutch pedal or fluid leaks signal the need to replace your clutch master cylinder promptly.
You’ll need a new clutch master cylinder compatible with your vehicle model, fresh brake fluid, and replacement seals or gaskets if not included. Essential tools include a wrench set (typically metric), line wrenches for hydraulic fittings, screwdrivers, pliers, and a catch container for draining fluid.
Additionally, a bleeding kit or vacuum pump will help remove air from the system after installation. Wearing gloves and safety glasses ensures protection during fluid handling.
Having these tools and parts ready streamlines the replacement process, minimizes downtime, and maintains your vehicle’s hydraulic clutch system reliability.
How to Locate and Access the Clutch Master Cylinder
To locate the clutch master cylinder, look for a small reservoir connected to the brake master cylinder near the firewall in the engine bay. You’ll need to clear any obstructing components or covers to gain proper access.
Once identified, ensure the area is clean before beginning the removal process.
Identifying Clutch Master Cylinder
Where exactly is the clutch master cylinder located, and how can you access it efficiently? Typically, it’s mounted on the driver’s side firewall inside the engine bay, directly connected to the clutch pedal assembly.
You’ll identify it by spotting a small cylindrical reservoir filled with hydraulic fluid and a metal or plastic housing linking to the clutch pedal pushrod. Avoid confusing it with brake master cylinders or other unrelated topics like power steering components.
If you’re unsure, consulting the vehicle’s service manual offers useful alternatives to visual identification, such as part numbers or schematic diagrams. Focus on the hydraulic lines leading from the reservoir, as these confirm the clutch master cylinder’s function and position.
Precise identification prevents errors before you proceed with removal or repair.
Accessing Engine Bay Components
How can you efficiently access the clutch master cylinder within the engine bay? First, open the hood and locate the brake fluid reservoir near the firewall on the driver’s side; the clutch master cylinder is typically mounted directly adjacent.
Clear any obstructing components or wiring harnesses for unobstructed access. Use a flashlight to identify the small cylinder connected to the clutch pedal via a pushrod inside the cabin.
Proper access is critical to diagnose issues like drivetrain noise or delayed gear engagement, often linked to master cylinder faults. Ensure the engine is off and cooled before beginning work.
Removing the engine cover or air intake components may be necessary for better reach. Maintain a clean workspace to prevent contaminant ingress that could affect hydraulic performance.
Getting Your Car Ready for the Repair
Before starting, gather all necessary tools like wrenches, screwdrivers, and brake fluid. Make sure your vehicle is parked on a flat surface with the parking brake engaged for safety.
Confirm the exact location of the clutch master cylinder to streamline the repair process.
Gather Necessary Tools
What tools will you need to efficiently replace the clutch master cylinder? Proper lesson planning applies here. Gathering the right tools ensures smooth workflow and maintains audience engagement, in this case, your focus on the task. Here’s a concise list of essentials:
| Tool | Purpose | Tip |
|---|---|---|
| Wrench Set | Remove/install bolts | Use correct size to avoid damage |
| Brake Fluid | Refill hydraulic system | Use manufacturer-recommended type |
| Bleeder Kit | Remove air from system | Essential for restoring clutch function |
Having these tools ready minimizes interruptions and errors. This pre-repair preparation aligns with effective lesson planning principles, allowing you to stay engaged and efficient throughout the clutch master cylinder replacement process.
Ensure Vehicle Safety
Where should you start to ensure your safety while working on the clutch master cylinder? Begin by preparing your vehicle to avoid hazards and protect your car upholstery from fluid spills. Follow these essential safety steps:
Park on a flat, stable surface and engage the parking brake firmly. Disconnect the battery to prevent electrical shorts or shocks. Use wheel chocks to prevent the car from rolling unexpectedly.
Lay down protective covers to shield the car upholstery from brake fluid or dirt. Wear gloves and eye protection to guard against harmful fluids and debris.
Prioritizing these measures not only protects you but also maintains road safety by preventing accidental vehicle movement during repair. Proper preparation reduces risks, ensuring a safer and more efficient clutch master cylinder replacement.
Locate Clutch Master Cylinder
A clutch master cylinder is typically located on the driver’s side firewall, near the brake master cylinder. To locate it accurately, familiarize yourself with common design patterns. It is usually a cylindrical reservoir connected to the clutch pedal’s pushrod.
Understanding these patterns reduces learning rates when identifying components, making your repair process efficient. Begin by opening the hood and visually inspecting the firewall area. The clutch master cylinder will have a fluid reservoir and hydraulic lines attached.
Use a flashlight if needed to distinguish it from the brake master cylinder, which is usually larger. Knowing these spatial and mechanical design distinctions helps you pinpoint the clutch master cylinder swiftly, ensuring you’re prepared for the next steps in the repair without unnecessary trial and error.
Draining and Removing the Old Clutch Master Cylinder
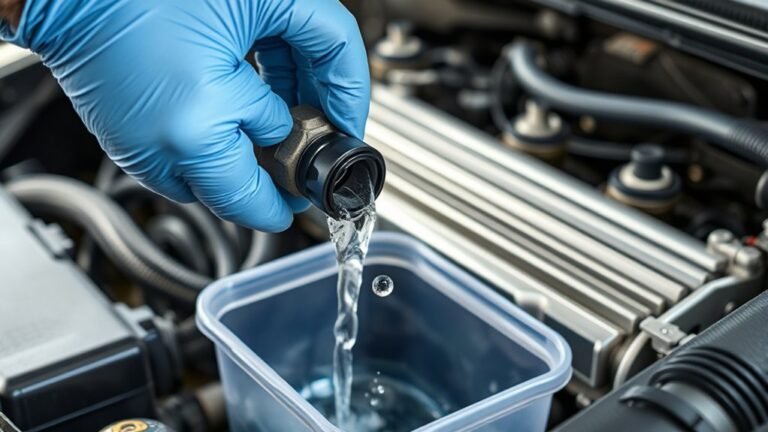
Before you remove the old clutch master cylinder, you’ll need to drain the hydraulic fluid to prevent spills and contamination. Proper fluid removal is essential for maintaining engine performance and fuel economy, as leaks can cause system inefficiencies. Follow these steps:
Locate the reservoir cap and remove it carefully. Use a turkey baster or syringe to extract fluid from the reservoir. Place a catch container under the master cylinder’s hydraulic line.
Carefully remove the reservoir cap and use a syringe to extract fluid into a catch container below the hydraulic line.
Loosen the hydraulic line fittings to allow fluid to drain completely. Disconnect the mounting bolts securing the cylinder to the firewall.
Once drained, carefully detach the hydraulic line and remove the cylinder. Handle components gently to avoid damaging seals, which could affect clutch operation and overall vehicle efficiency. Proper removal prepares you for a smooth installation of the new clutch master cylinder.
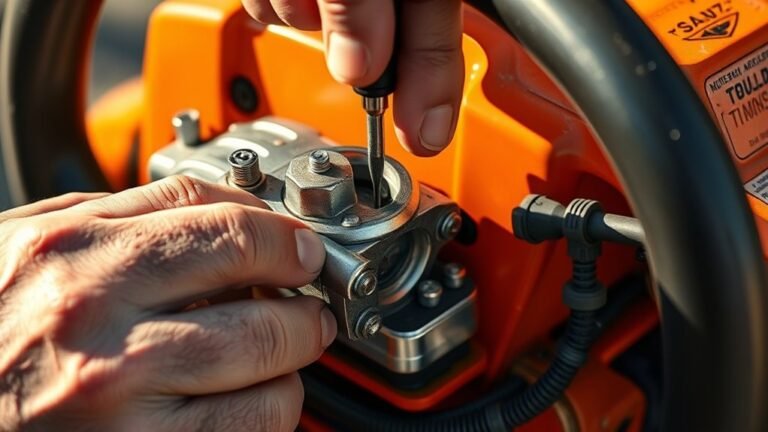
Installing the New Clutch Master Cylinder Correctly
With the old clutch master cylinder drained and removed carefully to avoid damaging seals, you’re ready to position the new unit. Begin by aligning the mounting holes precisely to ensure a secure fit, preventing any misalignment that could affect moving parts.
Secure the cylinder with appropriate fasteners, tightening them to manufacturer specifications to withstand dynamic forces during operation. Connect the hydraulic line carefully, avoiding any twists or kinks that could impede fluid flow.
Ensure all seals and gaskets are properly seated to prevent leaks under pressure. Double-check that the pushrod is correctly engaged with the clutch pedal mechanism, as improper engagement may cause premature wear or failure due to uneven dynamic loading.
Proper installation guarantees reliable clutch performance and longevity under operational stresses.
Bleeding the Clutch System After Replacement
Properly bleeding the clutch system is essential to remove air trapped in the hydraulic lines after replacing the master cylinder. Air pockets cause inconsistent pedal feel and can prevent proper clutch disengagement.
Bleeding the clutch removes air from hydraulic lines, ensuring consistent pedal feel and proper clutch operation.
To bleed the system effectively, follow these two word ideas closely:
- Attach a clear hose to the slave cylinder bleeder valve.
- Submerge the hose end in a container partially filled with fresh brake fluid.
- Have an assistant press the clutch pedal slowly while you open the bleeder valve.
- Close the valve before your assistant releases the pedal to avoid air re-entry.
- Repeat until no air bubbles appear in the fluid flowing through the hose.
Avoid discussing unrelated topic elements like engine tuning or electrical diagnostics here; focus strictly on hydraulic fluid and air removal for clutch system integrity.
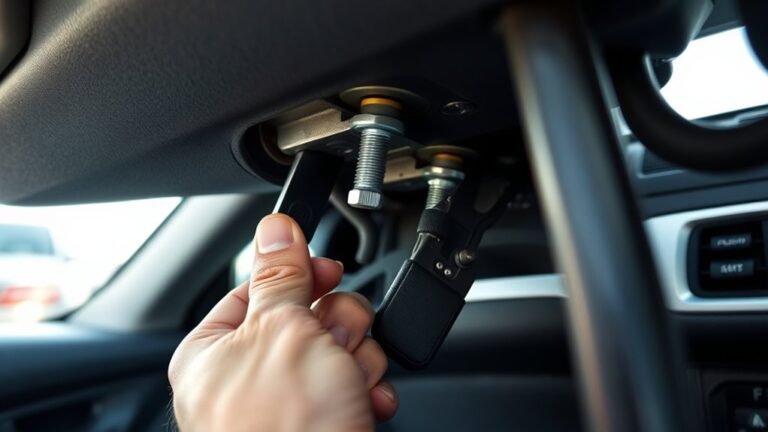
Testing Your Clutch Pedal for Proper Operation
Check your clutch pedal’s responsiveness and travel to guarantee the master cylinder replacement was successful. Begin by pressing the pedal slowly; it should engage smoothly without sponginess or excessive free play.
Measure pedal travel to ensure it aligns with manufacturer specifications, as improper travel can affect driving ergonomics and clutch engagement. The pedal feel must be firm yet consistent, allowing precise modulation when shifting gears.
If the pedal feels soft or inconsistent, it could indicate incomplete bleeding or a hydraulic issue. While seated, verify that pedal height and resistance restore normal driving ergonomics, preventing fatigue during operation.
Confirm that clutch engagement occurs at the expected pedal point, ensuring peak control. This testing step is essential to validate system integrity before resuming normal vehicle use.
Troubleshooting Clutch Master Cylinder Replacement Issues
Why might your clutch master cylinder replacement not perform as expected? Several issues can arise, often overlooked during installation. To troubleshoot effectively, consider these points:
Air trapped in the hydraulic system: Bleed the system thoroughly to avoid spongy clutch feel.
Incorrect part installation: Ensure all connections and seals are secure, preventing leaks.
Damaged or contaminated fluid: Replace with fresh clutch fluid; contamination reduces hydraulic efficiency.
Faulty or incompatible replacement parts: Verify the new cylinder matches your vehicle’s specifications.
Pedal linkage misalignment: Check that the clutch pedal and master cylinder rod engage smoothly.
While this isn’t a creative writing or smoothie recipes guide, approaching troubleshooting with the same methodical precision ensures your clutch master cylinder functions reliably.
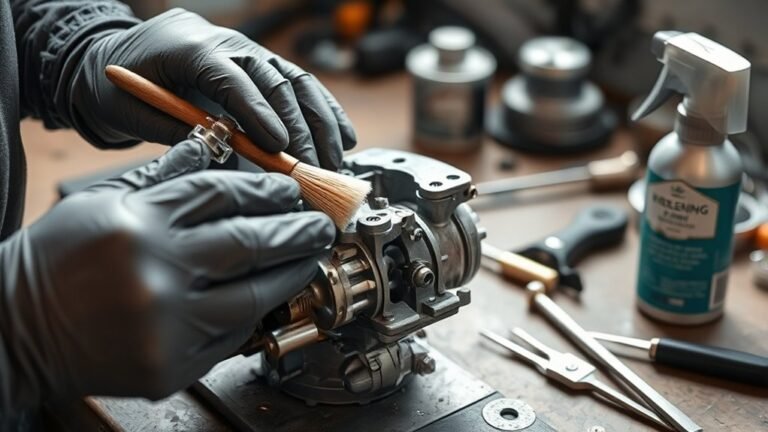
Maintaining Your Clutch Master Cylinder for Longevity
To extend the life of your clutch master cylinder, you need to regularly inspect the brake fluid for contamination and maintain proper fluid levels.
Keeping the hydraulic fluid clean prevents accelerated seal wear and system failure. Consistent maintenance helps avoid costly repairs and ensures reliable clutch operation.
Regular Fluid Inspection
Regularly inspecting the fluid level and condition in your clutch master cylinder is essential for preventing premature wear and ensuring consistent clutch performance. Low or contaminated clutch fluid can degrade pedal feel and impair hydraulic function.
To maintain optimal operation, you should:
- Check the fluid reservoir level against manufacturer specifications.
- Inspect the fluid color; it should be clear or light amber.
- Look for signs of contamination like debris or cloudiness.
- Monitor pedal feel for softness or inconsistency, indicating fluid issues.
- Top off with the correct type of clutch fluid as needed.
Perform these checks routinely, especially during scheduled maintenance. Proper fluid inspection helps avoid costly repairs and keeps your clutch master cylinder functioning reliably.
Preventing Seal Wear
How can you extend the life of your clutch master cylinder seals? Focus on managing pressure dynamics and preventing fluid contamination.
Excessive pressure spikes in the hydraulic system cause premature seal degradation by accelerating wear and creating micro-tears. Ensure the clutch hydraulic system is properly bled to maintain consistent pressure and avoid abrupt force changes.
Additionally, fluid contamination such as dirt, moisture, or degraded brake fluid compromises seal integrity by causing swelling, hardening, or cracking. Regularly inspect and replace the hydraulic fluid following manufacturer specifications.
Use only recommended, high-quality fluids to minimize chemical breakdown. Maintaining a clean reservoir and preventing air ingress also helps avoid contamination.
Frequently Asked Questions
What Causes a Clutch Master Cylinder to Fail Prematurely?
You’ll find clutch master cylinders fail prematurely due to hydraulic leaks, contamination, or worn seals. Clutch lighting issues can indicate internal damage, causing pressure loss.
Regular inspection helps prevent these failures and guarantees proper clutch function.
Can a Failing Clutch Master Cylinder Damage Other Transmission Parts?
Yes, a failing clutch master cylinder can cause clutch fluid leaks and loss of hydraulic pressure, leading to incomplete clutch disengagement.
This can damage the clutch release bearing and transmission synchronizers over time, increasing repair costs.
How Much Does It Typically Cost to Replace a Clutch Master Cylinder?
When you peek under the hood, the clutch master cylinder replacement typically costs between $150 to $300.
Though it’s unrelated to casual mechanical maintenance, precise diagnosis ensures you avoid unnecessary repairs or part swaps.
Are There Different Types of Clutch Master Cylinders for Various Car Models?
Yes, you’ll find different models of clutch master cylinders tailored to specific vehicles and their hydraulic systems. It’s essential to choose one matching your car’s exact specifications for proper function and durability.
Can I Drive My Car Safely With a Failing Clutch Master Cylinder?
You can’t drive safely with a failing clutch master cylinder; it compromises drivetrain stability and reduces pedal feel realism. This risks gear engagement issues and potential drivetrain damage. Immediate repair is essential for safe operation and control.