How Adjust Clutch Pedal
To adjust your clutch pedal, start by checking for excessive free play or stiffness, which can indicate misalignment. Proper adjustment is essential for smooth operation and to prevent premature wear.
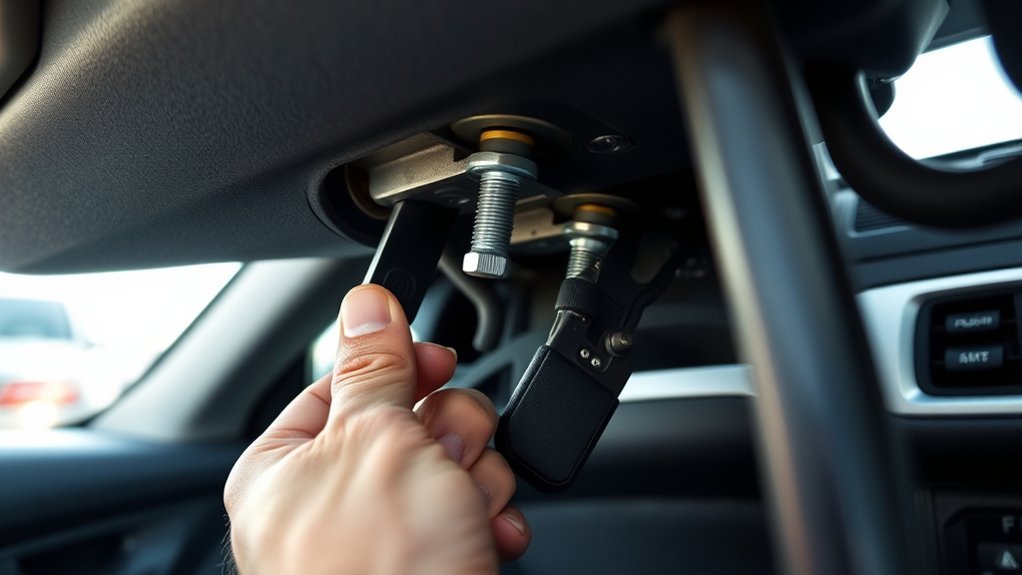
Use a wrench and screwdriver to loosen the locknut on the pushrod adjuster. Then, turn the adjuster to set the clutch pedal free play within the recommended range, typically 6–12 mm. After adjustment, retighten the locknut securely.
If your vehicle has a hydraulic clutch, make sure to bleed any air from the system to ensure proper engagement. Regularly testing and maintaining these settings will optimize your pedal’s performance and extend its longevity.
Signs Your Clutch Pedal Needs Adjusting
How can you tell when your clutch pedal needs adjusting? You’ll notice specific adjustment signs indicating improper clutch engagement.
First, if the clutch pedal feels unusually loose or has excessive free play before resistance, it suggests the pedal is misaligned. Conversely, if the pedal feels stiff or engages too close to the floor, that’s another clear adjustment sign.
You might also experience difficulty shifting gears smoothly or hear grinding noises during gear changes, signaling clutch pedal miscalibration. Additionally, if the vehicle creeps forward without pressing the pedal fully, it indicates premature clutch engagement requiring adjustment.
Monitoring these precise symptoms ensures timely clutch pedal adjustment, preventing premature wear and maintaining optimal drivability. Recognizing these adjustment signs promptly helps you maintain clutch system performance effectively.
Tools Needed for Clutch Pedal Adjustment
Noticing signs like excessive free play or difficulty shifting means it’s time to adjust your clutch pedal. For precise clutch pedal calibration and hydraulic system troubleshooting, you’ll need specific tools to ensure accuracy and safety.
| Tool | Purpose | Notes |
|---|---|---|
| Wrench Set | Loosen/tighten pedal components | Metric sizes usually required |
| Screwdriver Set | Adjust pedal stop screws | Flathead and Phillips types |
| Feeler Gauge | Measure pedal free play | Essential for accurate spacing |
| Hydraulic Pressure Tester | Check hydraulic system pressure | Critical for troubleshooting |
Having these tools ready lets you perform adjustments efficiently and diagnose potential hydraulic issues before proceeding. Always verify tool compatibility with your vehicle model.
How to Adjust Your Clutch Pedal Step-by-Step
When should you adjust your clutch pedal? Primarily, when you notice excessive travel or difficulty engaging gears. First, ensure clutch pedal compatibility with your vehicle model.
Adjust your clutch pedal if you experience excessive travel or trouble engaging gears, ensuring compatibility with your vehicle.
Begin by locating the pedal assembly and inspecting the pushrod for free play. If your vehicle uses a hydraulic system, be aware of hydraulic system quirks such as air trapped in the lines that may affect pedal feel.
To adjust, loosen the locknut on the pushrod, then turn the adjuster to decrease or increase pedal free play, aiming for manufacturer specifications. After adjustment, retighten the locknut securely.
For hydraulic systems, you might need to bleed the clutch to remove air. Always confirm pedal travel meets specs before reassembling. This step-by-step ensures precise clutch operation and prolongs component life.
How to Test Your Clutch Pedal Adjustment
To guarantee your clutch pedal is properly adjusted, start by measuring the clutch pedal free play with a ruler or gauge. Next, test the engagement point by slowly releasing the pedal and noting when the clutch begins to engage.
These checks confirm whether your adjustment allows smooth and effective clutch operation.
Clutch Pedal Free Play
How can you determine if your clutch pedal is properly adjusted? The key is measuring the clutch pedal free play, the amount the pedal moves before the clutch starts to disengage. Too much or too little free play means you need to adjust pedal settings for optimal performance.
Use a ruler or gauge to measure free play at the pedal’s top. Compare your measurement with the manufacturer’s specs.
| Free Play (mm) | Action Needed |
|---|---|
| 0-5 | Increase free play |
| 6-12 | Optimal free play range |
| 13-20 | Decrease free play |
| Over 20 | Significant adjustment |
Adjust pedal free play within the optimal range to ensure smooth clutch operation and prevent premature wear.
Engagement Point Check
Why is checking the engagement point essential for your clutch pedal adjustment? It ensures the clutch fully disengages and engages at the proper pedal travel, preventing slippage or dragging.
To test, start your vehicle and press the clutch pedal slowly while in gear. Note the pedal position where the engine power begins to transfer.
If the engagement point feels too high or low, it indicates improper pedal alignment or possible air in the hydraulic system. In that case, perform a hydraulic bleed to remove trapped air, restoring correct clutch operation.
After bleeding, recheck the engagement point to confirm the adjustment.
Precise engagement point verification guarantees smooth gear shifts and prolongs clutch component life, making it a critical step in your clutch pedal adjustment process.
Clutch Pedal Adjustment Mistakes to Avoid
What common errors should you watch out for when adjusting your clutch pedal? First, avoid setting the pedal free play too tight; this can cause clutch quirks like premature wear or pedal chatter.
Conversely, too much free play reduces clutch engagement control, leading to slipping. Don’t neglect to check the pedal height against manufacturer specifications, as incorrect height affects release point consistency.
Also, ensure all adjustment nuts and bolts are securely tightened. Loose fittings cause inconsistent pedal feel and chatter.
Avoid adjusting the pedal without first inspecting the hydraulic system or cable for leaks and stretch, since these issues mimic adjustment problems. Finally, don’t overlook testing the engagement point after adjustment; failing to do so can leave you unaware of unresolved clutch quirks that may worsen over time.
When You Should Call a Pro for Clutch Problems
When should you call a professional for clutch problems? If you encounter issues beyond simple pedal adjustments, it’s time to call a pro. Precise clutch installation and repair require specialized tools and expertise. Here are three situations when you should seek professional help:
- Persistent slipping or grabbing: If the clutch slips or grabs despite proper pedal adjustment, internal components like the pressure plate or clutch disc may be worn, needing expert diagnosis and replacement.
- Difficulty shifting gears: Hard or noisy gear changes can signal misaligned clutch installation or hydraulic system failures that require professional inspection.
- Unusual noises or vibrations: Grinding sounds or pedal vibrations often indicate worn bearings or damaged flywheel, demanding advanced mechanical skills.
In these cases, attempting DIY fixes risks further damage. Calling a pro ensures accurate, safe clutch operation.
Maintenance Tips to Keep Your Clutch Pedal Responsive
How often should you perform routine checks on your clutch pedal to maintain its responsiveness? It’s best to inspect it every 3,000 to 5,000 miles or during regular vehicle servicing.
Perform routine clutch pedal checks every 3,000 to 5,000 miles or during regular service for optimal responsiveness.
Focus on ensuring clutch pedal reliability by checking for smooth, consistent pedal travel. Start by examining the pedal assembly for wear or damage, and lubricate pivot points using a recommended grease to prevent stiffness.
Verify pedal travel consistency by measuring free play; adjust the clutch cable or hydraulic system as needed to maintain optimal engagement. Additionally, inspect the clutch master and slave cylinders for leaks, as fluid loss compromises pedal feel.
Regularly replacing hydraulic fluid ensures system integrity. Following these steps helps you maintain precise clutch operation and prolong component life.
Frequently Asked Questions
Can a Worn Clutch Pedal Cause Transmission Damage?
Think about it: wouldn’t poor clutch pedal durability increase transmission wear? Yes, a worn clutch pedal can cause transmission damage by impairing proper engagement, so maintaining pedal integrity is essential for transmission wear prevention and overall drivetrain health.
How Does Clutch Pedal Adjustment Affect Fuel Efficiency?
If your clutch pedal wear causes improper engagement, fuel efficiency drops due to engine load. Using pedal adjustment tools ensures precise clutch release, optimizing fuel use by reducing slippage and improving drivetrain efficiency. Adjust regularly.
Are Clutch Pedal Adjustments Different for Manual vs. Automatic Cars?
Yes, adjustment intervals and pedal feel differ between manual and automatic cars. You’ll find manual clutches require frequent pedal feel checks and precise adjustments.
Automatics often have sealed systems needing minimal intervention during adjustment intervals.
What Is the Average Cost of Professional Clutch Pedal Adjustment?
You’ll typically pay $50 to $150 for a professional clutch pedal adjustment. This fine-tuning guarantees clutch pedal longevity and reduces transmission wear, keeping your vehicle’s performance smooth and precise.
It also extends component life effectively.
Can Weather Conditions Impact Clutch Pedal Performance?
Yes, weather impact can affect clutch pedal performance by causing cable expansion or contraction. You’ll need to adjust pedal free play accordingly to maintain optimal function.
This is especially important in extreme heat, cold, or humid conditions for consistent operation.