How to Clean Fuel Filter
To clean your fuel filter, first locate it in your vehicle’s fuel system. Before removal, relieve the fuel system pressure to avoid fuel spray. Always wear gloves and goggles for safety during the process.
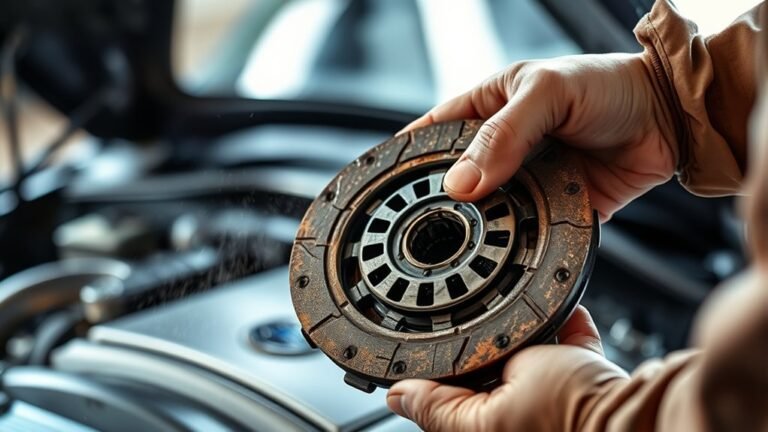
Next, carefully remove the fuel filter. Flush out any debris using a manufacturer-approved solvent, such as carburetor cleaner. Be sure to avoid damaging the filter media while cleaning.
When reinstalling, align the filter properly, matching the flow direction indicated on the filter. Secure the clamps without overtightening to prevent leaks. Finally, check all connections under ignition pressure to ensure a proper seal.
If you continue to experience performance issues after cleaning, replacing the fuel filter may be necessary. For best results, explore additional maintenance tips and troubleshooting advice.
Identify When Your Fuel Filter Needs Cleaning or Replacement
How do you know when your fuel filter needs cleaning or replacement? Begin by observing engine performance; hesitation or stalling during acceleration often signals fuel flow restriction. Conduct a drive belt inspection simultaneously, since a worn belt can indirectly affect fuel delivery systems.
Check for black smoke from the exhaust, which may indicate improper exhaust timing caused by clogged fuel filters. Use a fuel pressure gauge to measure pressure at the fuel rail. Low pressure confirms filter blockage.
Additionally, if your vehicle’s fuel economy drops noticeably, it’s a sign the filter could be compromised. Regularly inspecting these factors ensures you address fuel filter issues promptly, maintaining optimal engine function and preventing damage related to poor fuel flow and timing discrepancies.
Decide When to Replace Instead of Clean Your Fuel Filter
After identifying signs that your fuel filter may be clogged, the next step is determining whether cleaning will suffice or if replacement is necessary. This topic shift requires evaluating the filter’s condition: if contaminants are deeply embedded or the filter media shows damage, replacement is the more effective solution.
Consider maintenance tradeoffs. Cleaning might seem cost-effective but can be less reliable if the filter is severely degraded. Additionally, some fuel filters aren’t designed for cleaning and can lose filtration efficiency after an attempted clean.
If your vehicle manual recommends replacement intervals or you notice persistent performance issues despite cleaning, prioritize replacement. Deciding to replace rather than clean ensures consistent fuel flow and protects the engine from contaminants, maintaining peak operation and preventing costly repairs down the line.
Gather Tools and Materials for Fuel Filter Cleaning
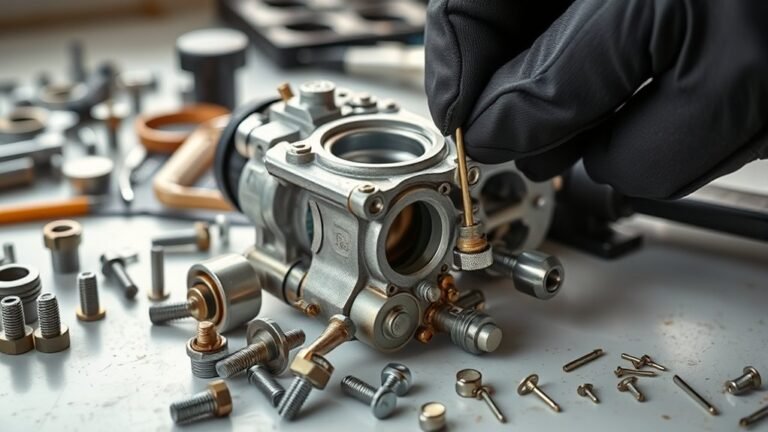
A proper fuel filter cleaning requires specific tools and materials to guarantee safety and effectiveness. You’ll need safety gloves and goggles to protect against fuel exposure.
Prepare a container for catching drained fuel and use a wrench set compatible with your vehicle’s fittings. Have clean rags and a suitable cleaning solvent, such as carburetor cleaner, ready.
Avoid relying on fuel additive myths; they don’t replace physical cleaning and can cause buildup. Remember, gas cap maintenance is also crucial. A faulty gas cap can allow contaminants into the fuel system, affecting filter performance.
Lastly, ensure you have a replacement fuel filter on hand if cleaning proves insufficient. Gathering these tools and materials before you start prevents delays and ensures a smooth, efficient cleaning process.
Locate Your Vehicle’s Fuel Filter
Before locating your vehicle’s fuel filter, ensure the engine is off and cooled to prevent accidents. Common fuel filter locations include along the fuel line under the car or near the fuel tank. These locations typically require basic hand tools for access. Always relieve fuel system pressure to avoid fuel spray during removal.
Common Fuel Filter Locations
Where exactly is your vehicle’s fuel filter located? Identifying its position is essential for proper fuel system maintenance and adhering to your maintenance schedule. Common locations include:
- Along the fuel line under the vehicle Often near the fuel tank or along the frame rail.
- Inside the fuel tank Integrated with the fuel pump assembly in some modern vehicles.
- In the engine compartment Mounted on the firewall or near the fuel injectors.
- Near the fuel rail Positioned close to the engine for quick fuel delivery.
Knowing these locations helps you access the filter efficiently during cleaning or replacement. Always consult your vehicle’s service manual for precise positioning, as variations exist depending on make and model. Proper identification ensures you maintain peak fuel flow and engine performance.
Tools Needed For Access
How do you ensure you have the right tools to access your vehicle’s fuel filter safely and effectively? Start by identifying the exact location of the fuel filter based on your vehicle model.
For most vehicles, you’ll need a set of wrenches or socket sets, preferably with ergonomic handles to reduce hand fatigue and improve grip during removal. A fuel line disconnect tool may be necessary for certain quick-connect fittings.
Additionally, a flashlight or inspection lamp helps illuminate tight spaces, enhancing cleaning safety by preventing accidental slips or damage. Have a drain pan ready to catch any residual fuel.
Selecting tools with good ergonomics minimizes strain, allowing precise maneuvering in confined areas. Proper preparation with the right tools ensures efficient, safe access for fuel filter maintenance.
Safety Precautions Before Searching
Why should you prioritize safety precautions before locating your vehicle’s fuel filter? Because working around fuel systems involves flammable liquids and pressurized lines, increasing risk. Proper hazard awareness and safety gear reduce injury and fire risks.
Before searching for the fuel filter, follow these steps:
- Wear appropriate safety gear: gloves, goggles, and flame-resistant clothing.
- Ensure the engine is off and cooled to prevent burns or ignition.
- Work in a well-ventilated area to avoid inhaling fuel vapors.
- Disconnect the vehicle’s battery to eliminate electrical sparks.
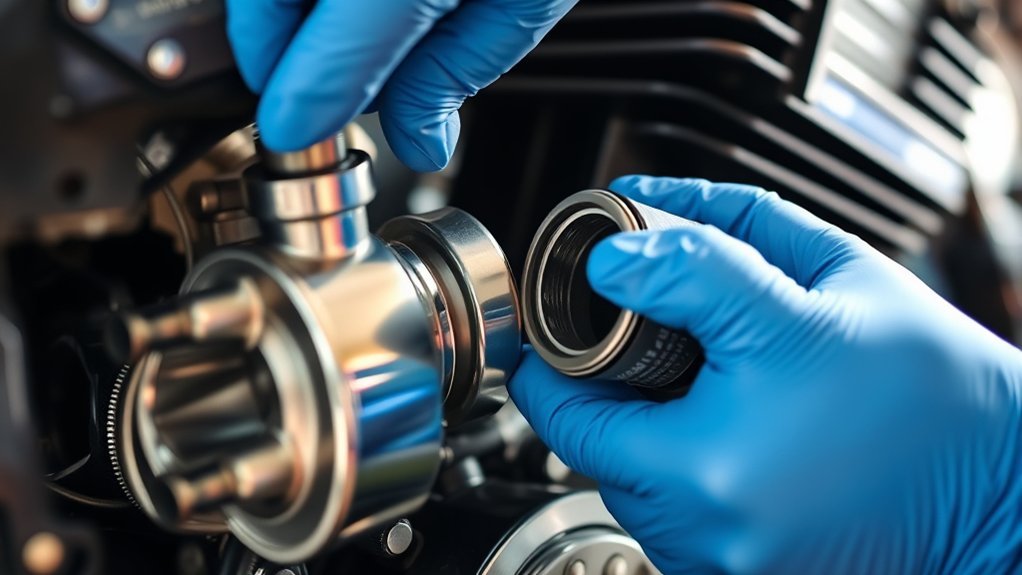
Safely Remove Your Fuel Filter
When you’re ready to remove the fuel filter, make sure the engine is off and cool to prevent burns or accidental ignition. Begin by relieving fuel system pressure to avoid fuel spray; consult your vehicle’s manual for exact procedures.
Wear safety goggles and gloves to adhere to fuel filter safety standards. Locate the filter, then use appropriate wrenches or quick-connect tools to detach fuel lines carefully. Have a container or rags ready to catch residual fuel.
Label or note the orientation of the filter to ensure correct reinstallation. Avoid open flames or sparks during this process. These topic ideas help prevent accidents and ensure efficient removal.
Follow these steps precisely to maintain safety and prepare your fuel filter for cleaning or replacement.
Clean Different Fuel Filter Types (Inline, Cartridge, Etc.)
Where should you start when cleaning various fuel filter types? Begin by identifying the filter type, inline, cartridge, or others, as each requires a distinct approach due to differences in filter material and design. Proper cleaning ensures optimal fuel quality and engine performance.
- For inline filters, disconnect the fuel lines carefully, then flush with a compatible solvent to remove debris without damaging the filter material.
- Cartridge filters often need disassembly; soak the cartridge in cleaning solution, then rinse and dry thoroughly.
- Inspect all seals and housings for wear or contamination; replace if necessary to maintain fuel quality.
- Avoid using harsh chemicals that degrade the filter material; always follow manufacturer guidelines for cleaning agents.
Following these steps will preserve fuel filter integrity and maintain efficient filtration.
Reinstall the Fuel Filter Correctly
When reinstalling the fuel filter, make sure you align it according to the flow direction indicated on the filter. Secure the clamps firmly to prevent any fuel leaks or disconnections.
After installation, inspect all connections carefully for leaks before starting the engine.
Align Fuel Filter Properly
How do you ensure the fuel filter is aligned properly during reinstallation? Proper alignment prevents misleading safety assumptions and unnecessary maintenance caused by improper fuel flow or leaks. Follow these steps:
- Identify the directional arrow on the filter indicating fuel flow direction; it must match the fuel line’s flow path.
- Position the filter so inlet and outlet ports align precisely with the corresponding fuel lines to avoid strain or misconnection.
- Confirm the filter sits flush against mounting points to maintain system integrity and prevent vibrations.
- Double-check that hoses are not twisted or kinked, ensuring consistent fuel delivery and avoiding premature wear.
Accurate alignment is critical for reliable operation and preventing inadvertent damage or downtime.
Secure Clamps Firmly
A secure clamp installation is essential to ensure the fuel filter remains firmly in place and prevents fuel leaks. Begin by positioning the bulky clamps around the filter’s inlet and outlet connections, ensuring they sit flush without twisting. Use a suitable tool to tighten the clamps evenly. Avoid overtightening, which could damage the filter housing or tubing.
Next, engage the securing harness, if present, to provide additional stabilization. The harness should be fastened snugly around the filter body, anchoring it to the vehicle frame or mounting bracket. Confirm that all clamps and the securing harness hold the filter firmly without excess movement.
Proper clamp and harness installation guarantees stable fuel flow and prevents dislodging during operation, maintaining system integrity and safety.
Check For Leaks
Why is it essential to verify the fuel filter installation before fully securing it? Performing a thorough leak inspection ensures no fuel escapes, which can cause safety hazards and engine inefficiency. Before tightening clamps, check for proper seal placement; if damaged, perform seal replacement to prevent leaks.
Follow these steps for effective leak inspection:
- Visually inspect all connections for gaps or damaged seals.
- Gently pressurize the fuel system by turning the ignition on without starting.
- Observe all joints carefully for any fuel seepage.
- If leaks appear, release pressure, replace faulty seals, and retest.
Completing this process guarantees the fuel filter is installed correctly and safely, preventing performance issues or fuel loss.
Maintain Your Fuel Filter for Longer Life
When should you perform routine maintenance on your fuel filter to ensure optimal performance and extended lifespan? Ideally, you should inspect and service the fuel filter every 15,000 to 30,000 miles, depending on your vehicle’s specifications and fuel quality.
Regular maintenance prevents clogging that impairs fuel efficiency and degrades combustion quality. Begin by draining any accumulated water and debris from the filter housing. Use manufacturer-approved cleaning solvents to flush contaminants without damaging filter media.
After cleaning, carefully reassemble and check for leaks. Additionally, replace the filter element if there are signs of wear or persistent clogging. Maintaining the fuel filter consistently ensures a steady fuel flow, promotes efficient combustion, and extends engine life by preventing contaminants from entering the fuel injection system.
Fix Common Problems After Cleaning Your Fuel Filter
How do you identify and resolve issues that may arise after cleaning your fuel filter? Addressing problems promptly prevents engine damage caused by insufficient maintenance or unexpected clogging.
Here’s how to fix common issues:
- Check for leaks: Tighten fittings or replace damaged seals to prevent fuel loss and air entry.
- Inspect flow rate: If fuel flow is reduced, re-clean or replace the filter element to avoid clogging.
- Bleed air from the system: Remove trapped air to restore proper fuel pressure and engine performance.
- Monitor engine behavior: Persistent stalling or hesitation signals residual debris; repeat cleaning or consider filter replacement.
Following these steps ensures your fuel filter functions to optimize, preventing performance degradation and extending engine life after maintenance.
Frequently Asked Questions
What Are the Symptoms of a Clogged Fuel Filter?
You’ll notice clogged filter signs like engine misfires, hesitation, reduced power, and difficulty starting. These symptoms indicate restricted fuel flow, causing fuel system wear.
Addressing this promptly prevents damage and maintains optimal engine performance.
Can a Dirty Fuel Filter Affect Engine Performance?
Yes, a dirty fuel filter restricts fuel flow, causing poor engine performance. You’ll experience reduced power and efficiency.
Regular engine maintenance, including fuel system checks, ensures optimal operation and prevents performance issues linked to clogged filters.
How Often Should Fuel Filters Be Cleaned or Replaced?
You should replace or clean your fuel filter every 20,000 to 30,000 miles to ensure ideal fuel system cleanliness. Regular fuel filter maintenance prevents clogging, maintaining efficient fuel flow and protecting engine performance.
Are There Any Risks of Cleaning a Fuel Filter Incorrectly?
Think you can skip safety steps? Cleaning a fuel filter incorrectly risks ignition and fuel system corrosion.
Always work in a well-ventilated area, avoid open flames, and use proper tools to prevent damage and ensure safe maintenance.
Can Using Fuel Additives Reduce Fuel Filter Clogging?
Yes, fuel additives can help with clog prevention by dissolving deposits and keeping contaminants suspended. However, they’re not a complete solution, so you should still maintain and replace your fuel filter regularly for optimal performance.