How to Tighten a Clutch Cable
To tighten your clutch cable, first locate the adjuster near the clutch lever or along the cable path. This is where you will make the necessary adjustments to reduce slack and improve clutch performance.
Loosen the locknut, then turn the adjuster barrel to reduce slack, aiming for about 2-3 mm of free play for smooth disengagement. Retighten the locknut securely once the adjustment is complete.
Check for proper lever feel and cable tension within manufacturer specifications to avoid slipping or stiffness. Regular inspection is key, and understanding these steps helps maintain precise clutch control and prolong cable life.
How To Know When Your Clutch Cable Needs Tightening
How can you tell when your clutch cable needs tightening? First, observe if the clutch lever feels loose or if there’s excessive free play before engagement. This can reduce your control during emergency braking, as the clutch may not disengage promptly.
Next, notice if the engine oil smell intensifies after shifting; slipping clutch plates often overheat, causing oil contamination. Also, if gear shifts become rough or the vehicle creeps forward with the lever pulled, the clutch cable tension is likely insufficient.
Regularly check the cable’s free play against manufacturer specs; excessive slack means it’s time for adjustment. Addressing these signs promptly ensures optimal clutch performance and prevents damage to transmission components. Don’t wait until the clutch fails during critical maneuvers like emergency braking.
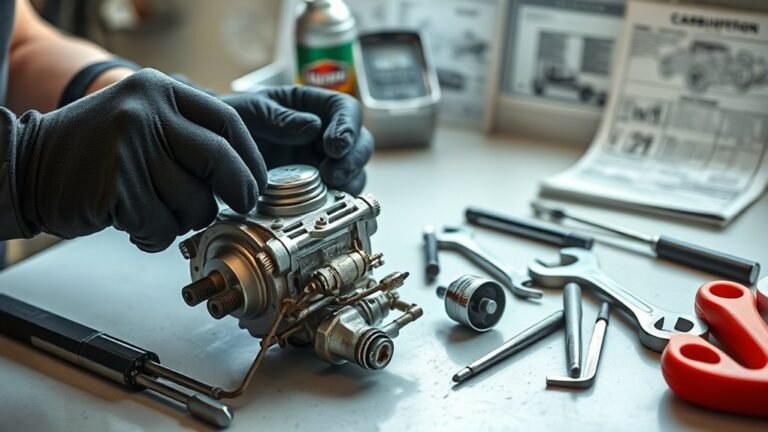
Essential Tools For Tightening A Clutch Cable
Noticing signs like excessive clutch lever play or rough gear shifts means it’s time to adjust the clutch cable tension. To do this precisely, you’ll need specific tools, much like how music theory structures compositions or fashion trends dictate styles. Here’s a quick guide to essential tools:
| Tool | Purpose | Tip |
|---|---|---|
| Wrench | Loosens/tightens adjuster nuts | Use correct size for grip |
| Screwdriver | Adjusts cable tension screws | Flathead preferred |
| Pliers | Holds cable steady | Needle-nose recommended |
| Lubricant | Reduces cable friction | Apply sparingly for smoothness |
Using these tools will ensure your clutch cable adjustment is efficient and accurate, preventing premature wear and maintaining optimal performance.
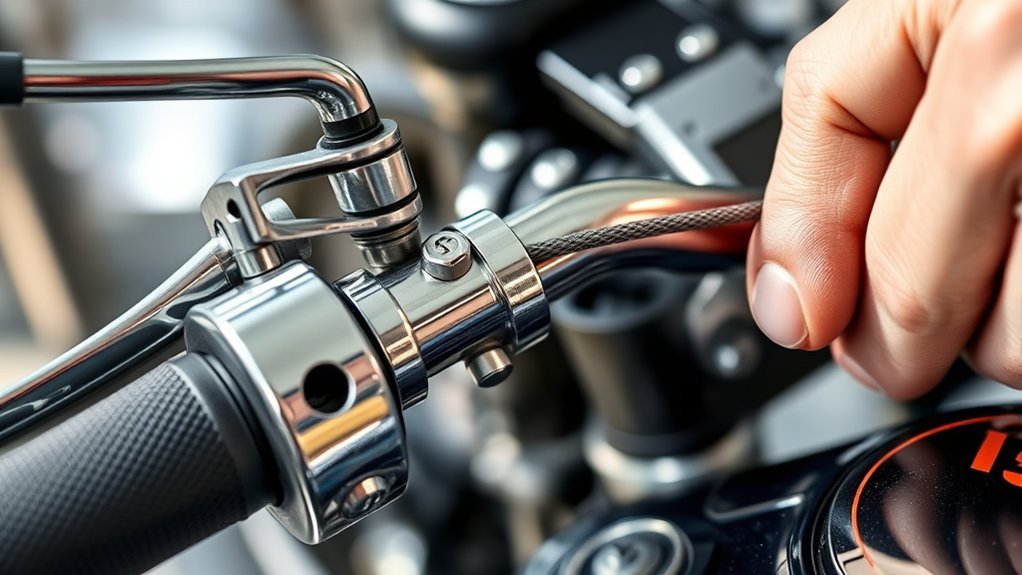
Finding The Clutch Cable Adjuster
Where exactly do you locate the clutch cable adjuster on your motorcycle? Typically, you’ll find it near the clutch lever on the handlebar or along the clutch cable route between the lever and the engine. The adjuster is a threaded barrel or nut that allows fine tension control.
Unlike clutch hydraulics systems, which use fluid pressure to engage the clutch, cable-operated clutches rely on this mechanical adjuster. Proper adjustment ensures smooth operation of transmission synchronizers by allowing precise clutch engagement and disengagement.
To identify the adjuster, follow the clutch cable from the lever down to the engine housing; you’ll see the adjuster either at the lever perch or close to the clutch release arm. Knowing its position is essential before proceeding to tighten or loosen the clutch cable correctly.
How To Tighten A Motorcycle Clutch Cable
When should you tighten your motorcycle’s clutch cable? Tighten it when you notice excessive slack or difficulty shifting gears. Start by locating the clutch cable adjuster near the handlebar or engine.
Loosen the locknut, then turn the adjuster to reduce slack until you achieve about 2-3mm of free play at the lever. Retighten the locknut to secure the setting.
| Symptom | Action | Result |
|---|---|---|
| Excess slack | Turn adjuster clockwise | Improved clutch response |
| Too tight cable | Turn adjuster counterclockwise | Easier lever operation |
| No free play | Adjust for 2-3mm slack | Prevents premature wear |
How To Tighten A Clutch Cable On A Manual Car
First, locate the clutch cable adjuster, usually found near the firewall or on the transmission linkage. You’ll need to loosen the locknut and turn the adjuster to increase or decrease cable tension.
Make sure to achieve the proper tension to ensure smooth clutch engagement without excessive slack.
Locate Clutch Cable Adjuster
How do you identify the clutch cable adjuster on your manual car? First, locate the clutch cable running from the clutch pedal to the transmission. The adjuster is typically found near the firewall or along the clutch cable housing, often resembling a threaded barrel with locknuts.
It allows you to fine-tune cable tension, which directly influences pedal leverage and engagement feel. Before adjusting, inspect the cable for signs of wear and ensure proper cable lubrication to prevent friction that can affect clutch response.
The adjuster will have visible threads and locknuts that secure it in place. If you have difficulty locating it, refer to your vehicle’s service manual, which usually provides detailed diagrams pinpointing the exact location of the clutch cable adjuster.
Adjust Cable Tension Properly
After locating the clutch cable adjuster, you’ll need to set the proper tension to guarantee smooth clutch operation and prevent slippage or dragging. Begin by loosening the locknut on the adjuster, then turn the adjuster barrel to either increase or decrease cable tension.
Aim for a slight free play, typically 10-20 mm at the clutch lever, to avoid an irreversible shift in clutch engagement. Over-tightening can cause premature wear or interfere with the hydraulic track if your system includes a hydraulic release mechanism.
Once adjusted, tighten the locknut securely to maintain tension. Test the clutch pedal for smoothness and ensure the cable isn’t binding or too loose. Proper adjustment ensures consistent clutch engagement and prolongs cable life without compromising the hydraulic track or transmission performance.
How To Check Clutch Cable Tension For Proper Adjustment
Why is verifying clutch cable tension essential before making any adjustments? Proper tension ensures smooth gear ratios and optimizes fuel economy by preventing slippage or incomplete disengagement. To check tension, first locate the clutch cable near the lever. Then, measure the free play, the amount the lever moves before resistance is felt.
| Step | Action |
|---|---|
| 1. Identify cable slack | Pull clutch lever gently, note free play |
| 2. Measure free play | Use a ruler; typical range: 10-20 mm |
| 3. Compare to specs | Check manufacturer’s recommended free play |
| 4. Inspect cable condition | Look for frays or corrosion |
If free play falls within specs and the cable is in good condition, tension is properly adjusted.
Fix A Clutch Cable That’s Too Tight Or Too Loose
If your clutch cable feels too tight or too loose, start by identifying the exact tension issue through visual and tactile inspection. Next, adjust the cable length using the appropriate adjusters to achieve optimal tension.
Finally, test the clutch’s function to ensure smooth engagement and disengagement before riding.
Identifying Cable Tension Issues
How can you tell if your clutch cable tension needs adjustment? Start by observing your clutch’s responsiveness. If you notice difficulty shifting gears, or the clutch doesn’t fully disengage, cable tension may be off.
A cable that’s too tight can cause premature clutch wear and may mimic symptoms like a misfiring engine due to improper gear engagement. Conversely, a cable that’s too loose can result in incomplete clutch release, leading to gear grinding.
While checking, ensure the issue isn’t related to unrelated problems such as squeaky brakes, which can be mistaken for clutch-related noises. Test the clutch lever play. Excessive free play or a lack of it indicates tension issues.
Identifying these signs accurately ensures you address clutch cable problems before they escalate.
Adjusting Clutch Cable Length
When should you adjust your clutch cable length? You need to do this if the clutch lever feels too tight or too loose, impairing smooth gear shifts.
First, locate the adjusters near the clutch lever or along the cable housing. Loosen the locknut, then turn the adjuster to lengthen or shorten the cable. Lengthening the cable decreases tension, useful if your clutch slips; shortening increases tension if the clutch doesn’t fully disengage.
Make small adjustments, then retighten the locknut. Remember to check clutch performance regularly, just like routine maintenance tasks such as changing oil or replacing spark plugs.
Proper cable length ensures optimal clutch operation and prevents premature wear. Avoid over-tightening to maintain mechanical integrity and ride safety.
Testing Clutch Cable Function
To accurately test your clutch cable function, start by observing the clutch lever’s free play and engagement point. Ensure the free play matches manufacturer specifications; too much or too little indicates adjustment is needed.
Engage the clutch and note if the lever feels smooth or stiff. This is crucial for a design critique of your bike’s clutch system. Consider how your adjustments impact marketing angles like reliability and user-friendliness.
Use the table below to track your clutch cable testing results:
| Test Aspect | Expected Outcome |
|---|---|
| Free Play | 10-20 mm |
| Engagement Point | Mid-lever travel |
| Lever Smoothness | Smooth, no sticking |
| Cable Tension | Moderate, no slack |
| Clutch Disengagement | Complete, no slipping |
This method ensures precise clutch cable function verification.
Signs Your Clutch Cable Is Worn Or Damaged
Why might your clutch feel less responsive or require more effort to engage? These symptoms often indicate a worn or damaged clutch cable. Look for visible fraying, kinks, or rust along the cable length, signs that compromise smooth operation.
Additionally, if you notice inconsistent clutch pedal travel or a spongy feel, the cable’s tension may be compromised. Avoid mixing discussion ideas about general vehicle maintenance or unrelated topics like brake systems; focus strictly on clutch cable condition.
Also, listen for unusual noises when pressing the pedal, such as grinding or snapping sounds, which suggest internal cable damage. Identifying these specific indicators helps you determine when tightening alone won’t suffice and replacement is necessary, ensuring your clutch system maintains optimal performance and safety.
How Often To Inspect And Adjust Your Clutch Cable
How frequently should you inspect and adjust your clutch cable to guarantee reliable performance? Ideally, check your clutch cable every 3,000 to 5,000 miles, or during routine maintenance intervals.
Regular inspections prevent unexpected failures and maintain optimal cable tension. Avoid treating this as an irrelevant topic or a random pairing with unrelated maintenance tasks; clutch cable condition directly impacts clutch engagement and vehicle control.
When inspecting, look for fraying, corrosion, or slack. Adjust the cable tension if you notice excessive free play or difficulty in clutch operation.
Consistent monitoring and timely adjustment ensure smooth gear shifts and prolong cable lifespan. By adhering to this schedule, you minimize wear and maintain precise clutch responsiveness critical for safe vehicle operation.
Troubleshooting Clutch Cable Issues After Adjustment
After tightening your clutch cable, you might encounter issues like excessive slack or difficulty engaging the clutch. To troubleshoot, first check for improper cable tension or frayed sections that could affect performance.
Diagnosing these malfunctions early ensures reliable clutch operation and prevents further damage.
Common Adjustment Problems
When you notice your clutch cable isn’t responding as expected following an adjustment, pinpointing the exact issue is essential. Common adjustment problems usually stem from improper tension settings, misaligned cable routing, or insufficient lubrication.
If the clutch feels too tight or loose, double-check your maintenance scheduling to ensure adjustments aren’t overdue. Also, inspect the cable for dirt or corrosion; applying proper lubrication techniques, such as using a light, penetrating oil inside the cable sheath, can restore smooth operation.
Avoid over-tightening, which can cause premature wear or cable snapping. Lastly, verify that the adjuster nuts are securely tightened after adjustment to prevent loosening during use.
Regular inspection and timely lubrication are key to maintaining clutch cable reliability and preventing recurrent adjustment issues.
Diagnosing Cable Malfunctions
If your clutch cable still isn’t performing correctly despite proper adjustment and lubrication, diagnosing potential malfunctions becomes necessary. Start by inspecting the cable for fraying, corrosion, or kinks that hinder smooth operation. Check the cable lubrication; inadequate or contaminated lubricant can cause stiffness.
Evaluate the clutch lever and release arm for proper movement and alignment. Consider the possibility of stretched cable requiring replacement rather than adjustment. Lastly, if recurring issues persist, assess whether a hydraulic conversion is a more reliable solution for consistent clutch engagement.
Key diagnostic steps include:
- Inspect cable for physical damage or fraying
- Verify adequate and clean cable lubrication
- Check lever and release arm alignment and movement
- Measure cable tension and check for stretch
- Evaluate feasibility of hydraulic conversion for better performance
Frequently Asked Questions
Can a Clutch Cable Break While Riding or Driving?
Yes, a clutch cable can break while riding, causing clutch failure. You should regularly inspect and maintain the cable to guarantee riding safety, preventing unexpected failures that could compromise control and lead to accidents.
Is It Possible to Upgrade to a Better Clutch Cable?
Yes, you can upgrade to better clutch cable options. Compare performance, durability, and material quality carefully.
Prioritize smoother operation, reduced stretch, and corrosion resistance. Choose cables matching your vehicle’s specifications for optimal clutch response and longevity.
What Are the Risks of Ignoring Clutch Cable Maintenance?
If you ignore clutch cable maintenance, clutch engagement can become erratic or fail, causing gear shifting issues.
Lack of cable lubrication leads to increased friction, cable wear, and potential snapping, risking costly repairs and unsafe riding conditions.
Can Weather Affect Clutch Cable Performance?
Like a rusty hinge, weather effects can cause your clutch cable to stiffen. Moisture and temperature changes accelerate corrosion factors, reducing responsiveness.
Regular inspection and lubrication combat these issues, maintaining smooth clutch operation despite environmental exposure.
How Long Does a Typical Clutch Cable Last?
A typical clutch cable lasts 30,000 to 50,000 miles, but wear issues can shorten this. Regular lubrication maintenance is essential to reduce friction and prevent premature failure, ensuring consistent clutch performance and longevity.