How Do I Adjust the New Fuel Pressure Regulator
To adjust your new fuel pressure regulator, start by parking your vehicle on a flat surface with the engine cool. Disconnect the negative battery cable to ensure safety before beginning any work.
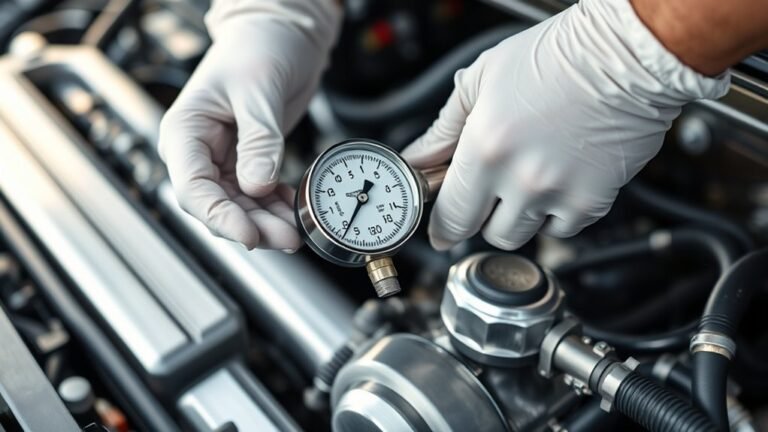
Locate the fuel pressure regulator near the fuel rail and attach a fuel pressure gauge to the test port. Turn the ignition on without starting the engine to get an accurate pressure reading.
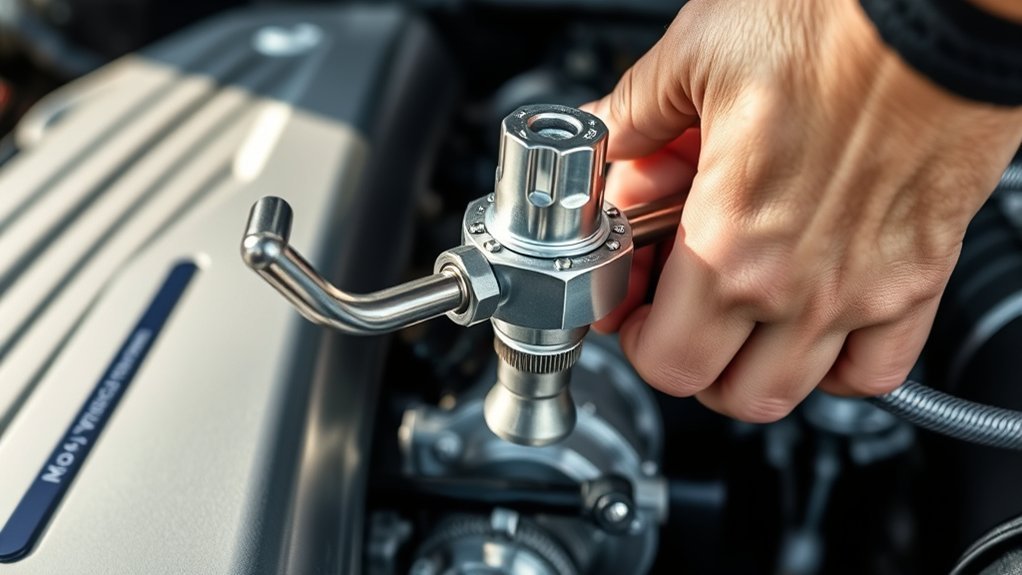
Use a screwdriver to turn the adjustment screw clockwise to increase the fuel pressure or counterclockwise to decrease it. After making adjustments, check carefully for any fuel leaks and monitor engine performance.
You can explore additional tuning tips to ensure precise fuel pressure settings and avoid potential issues.
Key Takeaways
- Park the vehicle on a flat surface with the engine off and relieve fuel system pressure before starting adjustments.
- Attach a calibrated fuel pressure gauge to the Schrader valve or test port for accurate pressure readings.
- Turn the ignition on without starting the engine to get a static fuel pressure reading.
- Adjust the regulator screw clockwise to increase or counterclockwise to decrease fuel pressure according to manufacturer specs.
- Secure the adjustment by tightening the locking nut, then verify pressure and check for leaks before completing the process.
Preparing Your Vehicle Before Adjusting the Fuel Pressure Regulator
Before you adjust the fuel pressure regulator, make sure your vehicle is safely parked on a flat surface and the engine is cool. This helps prevent accidents and ensures accurate readings.
Next, disconnect the negative battery cable to avoid electrical hazards. Locate the fuel pressure regulator, usually near the fuel rail or intake manifold, and inspect it for any visible damage or leaks.
Relieve the fuel system pressure by loosening the fuel cap or using the designated pressure relief valve; this step prevents fuel spray when you make adjustments. Finally, clean the area around the regulator to keep dirt and debris from entering the fuel system during the process.
Taking these preparation steps sets a safe, efficient foundation for adjusting your fuel pressure regulator.
Tools You’ll Need to Adjust Your Fuel Pressure Regulator
Which tools do you need to adjust your fuel pressure regulator effectively? First, you’ll need a fuel pressure gauge to measure the pressure accurately. This gauge typically connects to the fuel rail or test port.
Next, have a wrench or socket set handy, usually metric, to loosen or tighten bolts securing the regulator. A screwdriver, often flathead or Phillips, might be required for adjustment screws.
Don’t forget safety gear like gloves and eye protection to guard against fuel spray. Additionally, a rag or cloth helps clean any fuel spills.
Finally, keep a container nearby to catch any leaking fuel during adjustments. Having these tools ready ensures you can adjust your fuel pressure regulator safely and precisely without interruptions.
Locating and Accessing the Fuel Pressure Regulator
You’ll usually find the fuel pressure regulator near the fuel rail or on the fuel pump assembly. To access it, you’ll need a few basic tools like wrenches or screwdrivers depending on your vehicle.
Knowing the exact location and having the right tools ready will make the adjustment process much smoother.
Fuel Regulator Location
Where exactly is the fuel pressure regulator located in your vehicle? Usually, it’s found near the fuel injectors or along the fuel rail. Knowing its exact position helps you adjust or replace it without hassle. Here’s how you can pinpoint it:
- Check the fuel rail: The regulator often mounts at one end, connected to the fuel line.
- Look for a small cylindrical component: It usually has a vacuum hose attached and is smaller than injectors.
- Consult your vehicle’s manual: It provides diagrams and exact locations specific to your model.
Once you’ve located it, you’ll be ready to proceed with adjustments or inspections confidently. Understanding its placement saves time and prevents unnecessary disassembly.
Access Tools Needed
How do you get the right tools to access the fuel pressure regulator safely and efficiently? Start with a basic socket set and wrenches, as these are essential for loosening bolts and fittings.
You’ll also need a fuel line disconnect tool, especially for modern vehicles with quick-connect fittings. Have a flathead screwdriver handy for removing clamps or covers.
Safety gear like gloves and safety glasses are a must to protect yourself from fuel spills. Additionally, a rag or small container helps catch any leaking fuel.
Before starting, double-check your vehicle’s service manual for any specific tool recommendations. Having these tools ready ensures you can reach the regulator without damage or delay, setting you up for a smooth adjustment process.
How to Measure Fuel Pressure Accurately
When measuring fuel pressure accurately, what tools and techniques should you use to get reliable results? First, you need a quality fuel pressure gauge that matches your vehicle’s specifications. Next, ensure the engine is off and relieve fuel system pressure safely to avoid accidents. Finally, connect the gauge to the test port or fuel rail securely.
Follow these steps for precision:
- Use a calibrated fuel pressure gauge designed for your vehicle.
- Attach the gauge to the Schrader valve or test port properly.
- Turn on the ignition without starting the engine to get a static pressure reading.
Step-by-Step Guide to Adjusting the Fuel Pressure Regulator
Why adjust your fuel pressure regulator at all? Because setting the correct pressure ensures optimal engine performance and fuel efficiency. Start by locating the adjustment screw on the regulator.
Before you begin, relieve the fuel system pressure to avoid accidents. Connect a fuel pressure gauge to monitor changes.
Turn the ignition on without starting the engine, then slowly turn the adjustment screw clockwise to increase pressure or counterclockwise to decrease it. Watch the gauge closely and adjust until you reach the manufacturer’s specified pressure.
Once set, tighten any locking nuts to secure the adjustment. Finally, turn off the ignition, disconnect the gauge, and double-check for leaks.
With these steps, you’ll have your fuel pressure regulator dialed in accurately and safely.
Testing Engine Performance After Fuel Pressure Adjustment
Once you’ve adjusted the fuel pressure regulator, pay close attention to how your engine responds during different driving conditions. You’ll also want to track your fuel efficiency to see if the adjustment made a positive impact.
These checks will help ensure your tweak is improving overall performance.
Monitoring Engine Response
How can you tell if your fuel pressure adjustment is truly benefiting your engine? Monitoring the engine’s response is key. After adjusting the regulator, observe how your engine behaves under different conditions.
Here’s what to check:
- Idle Stability – Make sure the engine idles smoothly without surging or stalling.
- Acceleration Response – Notice if the throttle feels more responsive and the engine accelerates without hesitation.
- Engine Sound – Listen for any unusual knocking, pinging, or roughness that wasn’t there before.
If these areas improve, your adjustment is likely effective. If not, you may need to fine-tune the pressure or inspect other components.
Always test in a safe environment and keep notes of your adjustments and engine reactions for the best results.
Checking Fuel Efficiency
Frequently checking your fuel efficiency after adjusting the fuel pressure regulator helps you determine whether the changes are positively impacting your engine’s performance. Start by filling your gas tank completely and resetting your trip meter.
Drive normally for a set distance, then calculate your miles per gallon (MPG) by dividing the miles driven by the amount of fuel used. Compare this to your previous MPG to spot improvements or declines.
If you notice better fuel economy, your adjustment is likely successful. However, if fuel efficiency worsens, you might need to fine-tune the regulator again.
Remember to also monitor for unusual engine behavior during this test. Consistent checks ensure you maintain optimal performance and prevent issues caused by incorrect fuel pressure.
How to Recognize When Your Fuel Pressure Regulator Needs Readjustment
Watch for signs like engine hesitation, poor acceleration, or fuel leaks, as these often indicate your fuel pressure regulator may need readjustment. If you notice any of these problems, it’s time to take a closer look at your fuel system to avoid bigger issues.
Here are three key indicators to watch for:
- Unstable Idle: A fluctuating or rough idle can suggest inconsistent fuel pressure.
- Black Smoke from Exhaust: Excess fuel caused by high pressure leads to black smoke and poor combustion.
- Fuel Smell or Visible Leaks: Any fuel odor or leaks around the regulator or fuel lines signal pressure issues that need fixing.
Noticing these signs early helps you maintain engine performance and fuel efficiency before serious damage occurs.
Troubleshooting Common Fuel Pressure Regulator Problems
When your fuel pressure regulator acts up, where should you start troubleshooting? First, check for fuel leaks around the regulator and fuel lines. Leaks can cause pressure drops and poor performance.
Next, inspect the vacuum hose connected to the regulator for cracks or disconnections, as a faulty vacuum signal can affect pressure control. If the engine runs rough or stalls, test the fuel pressure with a gauge to see if it matches the manufacturer’s specs.
A pressure reading too high or too low indicates a bad regulator. Also, listen for unusual hissing sounds, which may signal diaphragm failure inside the regulator.
Finally, if you spot any issues, replace the regulator promptly to avoid engine damage and maintain fuel system efficiency.
Frequently Asked Questions
What Are the Symptoms of a Failing Fuel Pressure Regulator?
You’ll notice rough idling, poor fuel economy, and engine misfires if your fuel pressure regulator fails. You might also see black smoke from the exhaust or fuel leaks.
Your engine could stall or hesitate during acceleration.
Can a Faulty Fuel Pressure Regulator Cause Poor Fuel Economy?
Yes, a faulty fuel pressure regulator can cause poor fuel economy. It messes with the fuel mixture, making your engine run too rich or too lean, which wastes fuel and reduces your vehicle’s efficiency.
How Often Should the Fuel Pressure Regulator Be Replaced?
You should replace your fuel pressure regulator every 50,000 to 70,000 miles or sooner if you notice symptoms like poor fuel economy, rough idling, or fuel leaks.
Regular checks help keep your engine running smoothly.
Is It Safe to Drive With a Malfunctioning Fuel Pressure Regulator?
Of course, you can drive with a malfunctioning fuel pressure regulator if you love surprise engine stalls and mysterious fuel leaks. But seriously, don’t risk it; fix it promptly to avoid costly damage and unsafe driving conditions.
Are Aftermarket Fuel Pressure Regulators Better Than OEM Parts?
Aftermarket fuel pressure regulators can offer better performance or adjustability, but they’re not always superior to OEM parts. You’ll want to contemplate quality, compatibility, and your specific needs before choosing between them.
Conclusion
Adjusting your fuel pressure regulator might seem tricky, but with the right tools and steps, you’ve got this. Remember, small tweaks can make a big difference in performance. It’s a bit like tuning a musical instrument—sometimes you think it’s perfect, but a little adjustment hits the sweet spot.
Keep an eye on how your engine responds, and don’t hesitate to readjust if needed. Trust your instincts; your car will thank you! With patience and care, adjusting the new fuel pressure regulator will help you achieve the best performance from your vehicle.