How Do You Clean a Fuel Tank
To clean a fuel tank, first park your vehicle on a flat surface with the engine cool and disconnect the battery. Safely drain the fuel into approved containers to avoid spills and hazards. Then, carefully remove the tank from the vehicle.
You can scrub the interior manually with a brush or use a chemical cleaner to dissolve rust and debris. Make sure to wear protective gloves and work in a well-ventilated area for safety. After thoroughly cleaning the tank, flush the fuel lines to remove any remaining contaminants.
Replace the fuel filters to ensure clean fuel flow. Finally, securely reinstall the tank, reconnect the battery, and check for leaks. Keeping your fuel system clean prevents damage and costly repairs. Learn the detailed steps and safety tips to get it done right.
Key Takeaways
- Park the vehicle on a flat surface, cool the engine, disconnect the battery, and relieve fuel system pressure before starting tank cleaning.
- Drain fuel into approved containers, ventilate the workspace, and wear protective gloves, goggles, and a respirator mask for safety.
- Clean the tank manually by scrubbing and rinsing or use a chemical cleaner to dissolve rust and contaminants inside the tank.
- Flush fuel lines with clean fuel or solvent and replace fuel filters to remove debris and ensure system cleanliness after tank cleaning.
- Reinstall the tank securely, reconnect all lines and connectors, pressurize the system for leaks, and maintain clean fuel and seals to prevent future contamination.
The Importance of Cleaning Your Fuel Tank
Why should you clean your fuel tank regularly? Because keeping it clean prevents sediment, rust, and debris buildup that can clog fuel lines and filters, causing poor engine performance or even breakdowns. You don’t want contaminants circulating through your engine, reducing fuel efficiency or damaging vital components.
Over time, water can accumulate inside the tank, promoting corrosion that weakens the metal and leads to leaks. Regular cleaning helps maintain fuel quality and ensures your vehicle runs smoothly and reliably.
Neglecting this maintenance can result in costly repairs and inconvenient downtime. By staying on top of fuel tank cleaning, you protect your engine, extend its lifespan, and avoid unexpected issues that could leave you stranded. It’s a simple step with significant benefits.
Preparing Your Vehicle: Safety and Setup for Fuel Tank Cleaning
Before you start cleaning your fuel tank, how you prepare your vehicle can make all the difference in safety and efficiency. First, ensure your car is parked on a flat, stable surface and the engine is completely cool.
Proper vehicle preparation is key for safe and efficient fuel tank cleaning.
Disconnect the battery to prevent sparks or accidental electrical shorts. Relieve fuel system pressure by consulting your vehicle’s manual to avoid fuel spray. Drain as much fuel as possible from the tank, using approved containers to catch the liquid safely.
Remove any surrounding components that could obstruct access, like the fuel pump or lines, but keep track of all parts for reassembly. Finally, ventilate your workspace thoroughly to avoid inhaling fumes, and wear protective gloves and eyewear.
Taking these steps sets you up for a safe, smooth cleaning process.
Essential Tools and Materials for Cleaning Your Fuel Tank
To clean your fuel tank effectively, you’ll need the right cleaning supplies like detergents, brushes, and a fuel-safe solvent. Don’t forget to gear up with gloves, safety glasses, and a mask to protect yourself from harmful chemicals and fumes.
Having these essentials ready will make the process safer and more efficient.
Necessary Cleaning Supplies
Cooling a fuel tank requires a specific set of tools and materials to ensure the job is done safely and effectively. You’ll need a fuel tank cleaner or a mild solvent designed to break down residues without damaging the tank.
A stiff brush or a tank cleaning brush helps scrub away stubborn grime inside. Have a siphon pump or hand pump ready for draining old fuel and flushing the tank.
Clean rags or microfiber cloths are essential for wiping down surfaces after cleaning. Don’t forget a container to catch drained fuel and waste.
Additionally, some use compressed air to dry and blow out debris. Using the right supplies lets you clean thoroughly while protecting your tank’s integrity and preventing contamination.
Protective Gear Essentials
Why should you prioritize protective gear when cleaning a fuel tank? Fuel and its fumes are hazardous, so you need proper protection to avoid burns, inhalation, and skin irritation.
Always wear chemical-resistant gloves to shield your hands from fuel and cleaning solvents. Safety goggles are essential to protect your eyes from splashes and debris.
A respirator mask helps you avoid inhaling harmful fumes, especially in poorly ventilated areas. Long sleeves and pants reduce skin exposure, and steel-toed boots protect your feet from heavy parts or spills.
Don’t forget ear protection if you use noisy power tools during the process. Equipping yourself with the right gear not only keeps you safe but also lets you focus on cleaning efficiently without unnecessary risks.
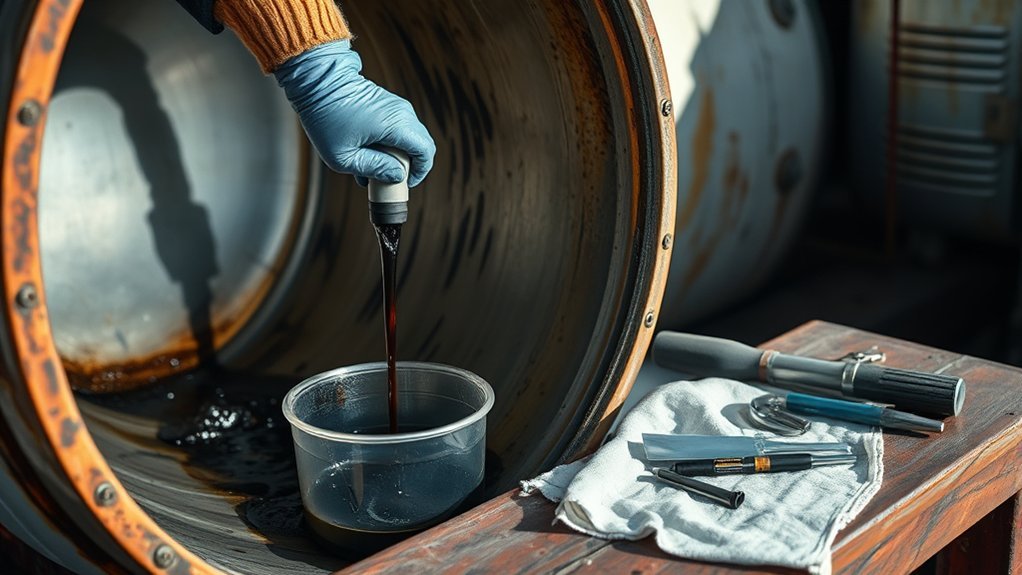
How to Safely Drain Fuel From Your Fuel Tank
How do you safely drain fuel from your fuel tank without risking spills or injury? First, make sure you’re working in a well-ventilated area, away from open flames or sparks.
Wear your protective gear: gloves, goggles, and a mask. Locate the fuel petcock or drain plug if your tank has one.
Use a proper fuel siphon pump to transfer the fuel into an approved container. Avoid using mouth suction or improvised tools. Keep a fire extinguisher nearby in case of emergencies.
If your tank doesn’t have a drain plug, you may need to carefully loosen the fuel line at the lowest point, catching the fuel in a sealed container.
Always dispose of drained fuel according to local regulations to protect the environment and yourself.
Removing Fuel Tanks From Cars, Motorcycles, and More
When you need to remove a fuel tank from a car, motorcycle, or other vehicle, knowing the proper steps can save you time and prevent damage. First, ensure the tank is completely drained and the vehicle is on a stable surface. Disconnect the battery to avoid sparks.
Removing a fuel tank safely starts with draining it, stabilizing the vehicle, and disconnecting the battery.
Next, carefully detach any fuel lines, electrical connections, and mounting bolts holding the tank in place. Labeling connections helps during reassembly. For motorcycles, removal is often easier but still requires caution with fuel lines and brackets.
Use proper tools and avoid forcing parts to prevent damage. Once loose, gently lower the tank, watching for any remaining connections. Store the tank in a safe, ventilated area before cleaning.
Following these steps protects you and your vehicle.
Inspecting Your Fuel Tank for Rust, Dirt, and Damage
Before cleaning, carefully inspect your fuel tank for rust spots that can cause leaks or contamination. Check inside and out for dirt buildup that might clog your fuel system.
Also, look for any physical damage that could affect the tank’s performance or safety.
Identifying Rust Spots
Why does identifying rust spots matter when inspecting your fuel tank? Rust can weaken the metal, leading to leaks or contamination. When you check your tank, look closely for reddish-brown patches or flaky areas on both the inside and outside surfaces.
Use a flashlight to spot subtle discolorations that might indicate early rust formation. Tap gently with a tool; a dull sound could signal corrosion beneath the surface. Don’t ignore small spots—they can quickly spread and cause serious damage.
If you find rust, you’ll need to address it before cleaning or refilling the tank. Catching rust early helps you maintain fuel quality and avoid costly repairs. Stay thorough, so your fuel system stays reliable and safe.
Checking for Dirt
How thoroughly have you examined your fuel tank for dirt and debris? Start by visually inspecting the inside of the tank with a flashlight. Look for any sediment, dust, or sludge that may have settled at the bottom.
Dirt can clog fuel lines and filters, so catching it early is essential. Run your fingers gently along accessible surfaces to feel for grime or sticky buildup. Pay close attention to areas around the fuel inlet and seams, where dirt often collects.
If you spot dirt, plan to flush the tank using appropriate cleaning solutions. Remember, the cleaner your tank is before refilling, the better your fuel system will perform.
Regularly checking for dirt helps prevent future fuel contamination and extends your engine’s life.
Assessing Physical Damage
Physical damage to your fuel tank can compromise its integrity and lead to leaks or contamination. Start by visually inspecting the tank for rust spots, dents, or cracks. Use a flashlight to check hard-to-see areas inside the tank, where rust and debris often accumulate.
Tap the tank gently with a small hammer; a dull sound could indicate weak spots or corrosion. If you find rust, assess its depth. Surface rust can be cleaned, but deep corrosion may require repair or replacement.
Dirt and debris inside the tank can clog fuel lines and filters, so ensure the interior is clean. Any visible damage or significant rust means you should address it before refilling to avoid costly engine problems or safety hazards.
How to Clean Your Fuel Tank: Manual and Chemical Methods
Regularly cleaning your fuel tank prevents buildup that can clog your engine and reduce performance. You can clean it manually or use chemical methods depending on the tank’s condition.
For manual cleaning, drain the tank, remove debris, and scrub the interior with a brush. Chemical cleaning involves adding a fuel tank cleaner to dissolve rust and contaminants.
| Method | Steps |
|---|---|
| Manual Cleaning | Drain tank, scrub interior, rinse |
| Chemical Cleaning | Add cleaner, let sit, drain, refill |
| Safety Tips | Wear gloves, work in ventilated area |
| Frequency | Clean every 1-2 years or as needed |
Choose the method that fits your needs, and always follow safety guidelines.
Flushing Fuel Lines and Replacing Fuel Filters After Cleaning
After cleaning your fuel tank, you’ll need to flush the fuel lines to remove any leftover debris and prevent clogs. Follow a clear step-by-step guide to ensure you flush thoroughly and safely.
Then, choose the right fuel filter to keep your engine running smoothly and protect your system from future contaminants.
Importance Of Flushing
Why should you flush fuel lines and replace fuel filters once you’ve cleaned the fuel tank? After cleaning, debris and contaminants can still linger in the lines and filters. Flushing removes these particles, preventing clogs and ensuring smooth fuel flow.
Replacing the fuel filter guarantees that new impurities won’t harm your engine. Neglecting this step can lead to poor performance or costly repairs.
| Benefit | Explanation |
|---|---|
| Prevents Clogs | Removes leftover debris |
| Protects Engine | Stops contaminants from reaching it |
| Improves Efficiency | Ensures smooth fuel delivery |
| Extends Component Life | Reduces wear on parts |
Flushing and replacing filters keep your fuel system clean and reliable after tank maintenance.
Step-By-Step Flushing Guide
Flushing the fuel lines and replacing the fuel filters are the next steps once you’ve cleaned the fuel tank. Start by disconnecting the fuel lines carefully to avoid spills.
Use a fuel line flush kit or pressurized container with clean fuel or solvent to push out debris and old residue. Let the flush run until the output is clear.
After flushing, install new fuel filters to ensure contaminants don’t re-enter the system. Make sure to secure all clamps and connections tightly to prevent leaks.
Finally, reconnect the fuel lines and check for any leaks or abnormalities when you turn the engine on. This step-by-step approach ensures your fuel system stays clean and maintains optimal performance after tank cleaning.
Choosing The Right Filter
How do you know which fuel filter works best for your vehicle after cleaning the tank? Start by checking your vehicle’s manual for the manufacturer’s recommended filter type and specifications. Using the correct filter ensures proper fuel flow and prevents contaminants from reaching the engine.
Opt for filters made from high-quality materials that match your fuel system’s requirements. If you’re unsure, consult a trusted mechanic or parts specialist. After flushing the fuel lines, replace the old filter immediately to avoid clogging and damage.
Installing the right filter also helps maintain optimal engine performance and fuel efficiency. Don’t skip this step; choosing the proper filter completes the cleaning process and safeguards your fuel system’s longevity.
Reinstalling the Fuel Tank and Checking for Leaks
Carefully position the cleaned fuel tank back onto its mounting brackets, ensuring all connections align properly. Secure the tank with the straps or bolts you removed earlier, tightening them to the manufacturer’s specifications.
Reconnect the fuel lines, electrical connectors, and any vent hoses, making sure each fits snugly to prevent leaks. Once everything’s reattached, turn on the ignition without starting the engine to pressurize the fuel system.
Inspect all connections and the tank itself for any signs of fuel leakage. If you notice any drips or wet spots, tighten fittings or reseat hoses as needed. Finally, start the engine and watch closely for leaks during operation. Address any leaks immediately to avoid safety hazards or damage.
How to Prevent Fuel Tank Contamination in the Future
After ensuring your fuel tank is securely reinstalled and free of leaks, the next step is to keep it that way by preventing future contamination. Always use clean, high-quality fuel and avoid filling up at questionable stations.
Regularly inspect your fuel cap and seals to ensure they’re tight and intact, preventing dirt and moisture from entering. Drain water separators and change fuel filters as recommended by your vehicle’s manufacturer.
Store your vehicle or equipment in a dry, covered area to minimize exposure to dust and humidity. Consider adding fuel stabilizers if the fuel will sit for extended periods.
Frequently Asked Questions
How Often Should I Clean My Fuel Tank?
You should clean your fuel tank every 1-2 years or whenever you notice fuel contamination or engine performance issues.
Regular checks help prevent buildup and keep your engine running smoothly without unexpected problems.
Can I Use Household Cleaners to Clean a Fuel Tank?
You shouldn’t use household cleaners to clean a fuel tank because they can damage the metal and leave harmful residues.
Instead, use specialized fuel tank cleaners designed to remove rust and deposits safely and effectively.
Is It Safe to Clean a Fuel Tank Myself or Should I Hire a Professional?
You can clean a fuel tank yourself, but you shouldn’t if you lack experience, proper tools, or safety gear. Hiring a professional ensures thorough cleaning, prevents damage, and protects you from hazardous fumes and accidents.
What Are the Signs That Indicate My Fuel Tank Needs Cleaning?
You’ll notice rough idling, engine stalling, or fuel odors if your tank needs cleaning. Also, check for rust, sludge buildup, or reduced fuel efficiency.
Don’t ignore these signs; they indicate it’s time to clean your fuel tank.
Can a Dirty Fuel Tank Affect My Vehicle’s Fuel Efficiency?
Like a clogged river slowing its flow, a dirty fuel tank can reduce your vehicle’s fuel efficiency. You’ll notice sluggish acceleration and higher fuel consumption.
Cleaning it helps your engine run smoothly and saves you money.
Conclusion
Now that you’ve scrubbed away grime and flushed out residue, imagine your fuel tank gleaming like a polished gem, ready to fuel your next adventure. Keeping it clean not only boosts performance but also protects your engine’s heart.
With the right care and routine checks, you’ll avoid future clogs and contamination, letting your vehicle run smoothly like a well-oiled machine. So, roll up your sleeves and keep that tank sparkling for a ride that’s always ready to roar.
Remember, knowing how to clean a fuel tank properly ensures your vehicle stays in top shape and performs at its best every time you hit the road.