How to Remove a Fan Clutch Without the Tool
To remove a fan clutch without the tool, first determine whether the clutch is threaded or bolted. This will help you decide the best removal method.
Next, immobilize the fan clutch by wedging a non-marring object between the fan blades and the radiator to prevent it from spinning. Use adjustable wrenches, pliers, or a strap wrench to apply steady counterclockwise pressure.
Hold the water pump pulley nut securely to keep it from moving while you loosen the clutch. If the fan clutch is stuck, apply penetrating oil and try again carefully. Following these steps will help you avoid damage and make removal easier.
What Type of Fan Clutch Do You Have?
Before you begin removing the fan clutch, it’s important to identify which type you’re dealing with. Fan clutches typically come in two main varieties: the older, mechanically driven type with a threaded hub and the newer, non-threaded type secured with bolts or nuts.
Knowing this is crucial because using methods or tools designed for one type on the other can cause damage or inefficiency. Avoid getting distracted by irrelevant topics or unrelated ideas, such as general engine maintenance tips or unrelated cooling system components, which do not impact the removal process.
Focus solely on distinguishing whether your fan clutch is threaded or bolted. This clarity ensures you choose the correct removal approach, preventing unnecessary effort and potential harm to your vehicle’s cooling assembly.
Household Tools That Can Help Remove a Fan Clutch
Several common household tools can assist you in removing a fan clutch when specialized equipment isn’t available. Before starting, review safety considerations like wearing gloves and eye protection to avoid injury. Using these tools effectively requires proper technique and awareness of the clutch type.
| Tool | Purpose | Safety Consideration |
|---|---|---|
| Adjustable Wrench | Loosens fan clutch nut | Ensure a secure grip to prevent slippage |
| Screwdriver | Leverages or holds components | Use padded handles to avoid hand fatigue |
| Pliers | Grips small parts or bolts | Avoid excessive force to prevent damage |
These topic ideas highlight practical tools you likely have, helping you proceed without the official fan clutch tool.
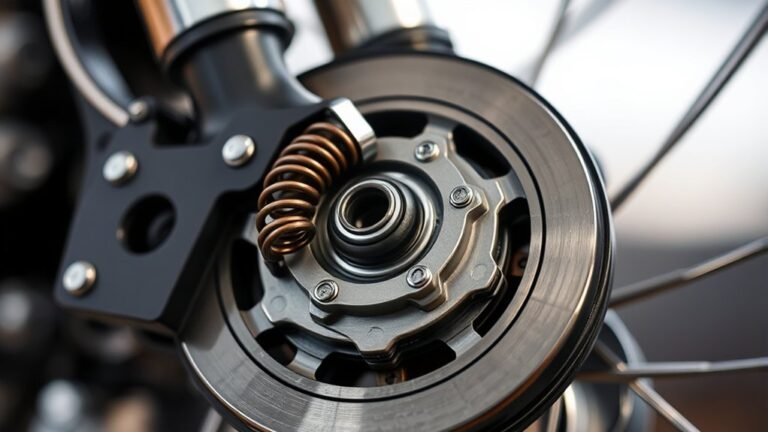
How to Stop the Fan Clutch From Spinning During Removal
How do you prevent the fan clutch from spinning while loosening it? You need to immobilize the fan clutch carefully to avoid damaging the assembly. Using excessive force or improper methods can cause irreversible failure to the clutch or the water pump.
One practical technique is to wedge a sturdy, non-marring object, like a wooden block or a fan blade holder, between the fan blades and the radiator shroud to hold the clutch steady. Avoid metal tools that can slip and damage components, potentially voiding your warranty.
Additionally, ensure the engine is cool to prevent heat-related damage. Preventing rotation during removal is critical; otherwise, you risk stripping the clutch threads or damaging the pulley, which leads to costly repairs and a voided warranty.
Step-by-Step: Loosen a Fan Clutch Without a Tool
Wondering how to loosen a fan clutch without a specialized tool? First, clear away any irrelevant topic or random chatter that might distract you. Focus strictly on the mechanical steps. Here’s how to proceed:
- Position the engine so the fan clutch is accessible without obstructions.
- Use a wrench or adjustable pliers on the water pump pulley nut to hold it steady, preventing the fan clutch from spinning.
- With your free hand, turn the fan clutch nut counterclockwise to loosen it. Apply steady pressure to avoid stripping threads.
Use a Strap Wrench or Belt to Loosen the Fan Clutch
When using a strap wrench or belt, select one with a strong, non-slip material to guarantee a secure grip on the fan clutch. Position the strap evenly around the clutch, avoiding any contact with the fan blades or radiator.
Apply steady, controlled pressure to turn the clutch without damaging its surface or surrounding components.
Choosing The Right Strap
Why is choosing the right strap essential for loosening the fan clutch without a specialized tool? Selecting an incompatible strap risks slippage, damage, or injury. To ensure effective and safe removal, focus on:
- Strap compatibility: The strap must fit securely around the fan clutch without excessive slack or tightness, ensuring a firm grip without damage.
- Material strength: Opt for a strap or belt made from durable, non-stretch materials to withstand the torque applied during loosening.
- Belt safety: Avoid worn or frayed belts; compromised integrity increases the chance of snapping under strain.
Proper Strap Placement
How exactly should you position the strap to maximize grip and leverage when loosening the fan clutch? Proper strap placement is crucial for effective torque application. Wrap the strap wrench or belt securely around the fan clutch hub, ensuring it sits flat without twisting.
Position the strap as close to the base of the clutch as possible to reduce slippage and increase control. Avoid placing the strap over any delicate components or fan blades.
| Strap Placement | Grip Quality | Leverage Efficiency |
|---|---|---|
| Base of clutch | High | Optimal |
| Mid-section | Moderate | Reduced |
| Edge of clutch | Low | Inefficient |
| Twisted strap | Very low | Unsafe |
These two-word ideas—strap placement—are key for safe, efficient loosening without dedicated tools.
Applying Controlled Pressure
Where should you apply pressure to loosen the fan clutch effectively? You need to focus the force on the clutch’s outer edge using a strap wrench or a sturdy belt, ensuring even distribution to avoid irreversible damage. Follow these steps precisely:
- Position the strap wrench or belt securely around the clutch’s circumference without slipping.
- Apply steady, controlled pressure in the counterclockwise direction to break the clutch free.
- Avoid sudden or excessive force, which can cause safety hazards or damage to the clutch and surrounding components.
Controlled pressure prevents stripping or warping the fan clutch while minimizing safety risks. Remember, uneven or excessive force can result in costly repairs, so maintain a firm but measured grip throughout the process.
This method ensures safe, effective removal without specialized tools.
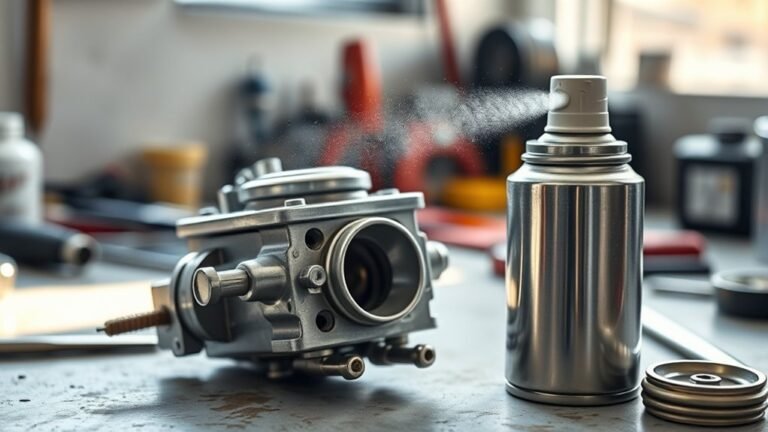
How to Apply Penetrating Oil to Loosen a Stuck Fan Clutch
When dealing with a stuck fan clutch, applying penetrating oil correctly can make all the difference in loosening seized components. Focus on precise oil placement by targeting the clutch’s mounting bolts and the interface between the clutch and water pump pulley.
Use a spray nozzle or a small brush to ensure the oil penetrates tight spaces without excess runoff. Avoid saturating unrelated parts to prevent contamination. After application, allow the oil to soak for at least 10–15 minutes; this dwell time is crucial for breaking down rust and corrosion.
If you lack specialized tools, oil placement enhances the effectiveness of tool alternatives like adjustable wrenches or pry bars by reducing friction. Properly applied penetrating oil minimizes damage risk and simplifies subsequent removal efforts.
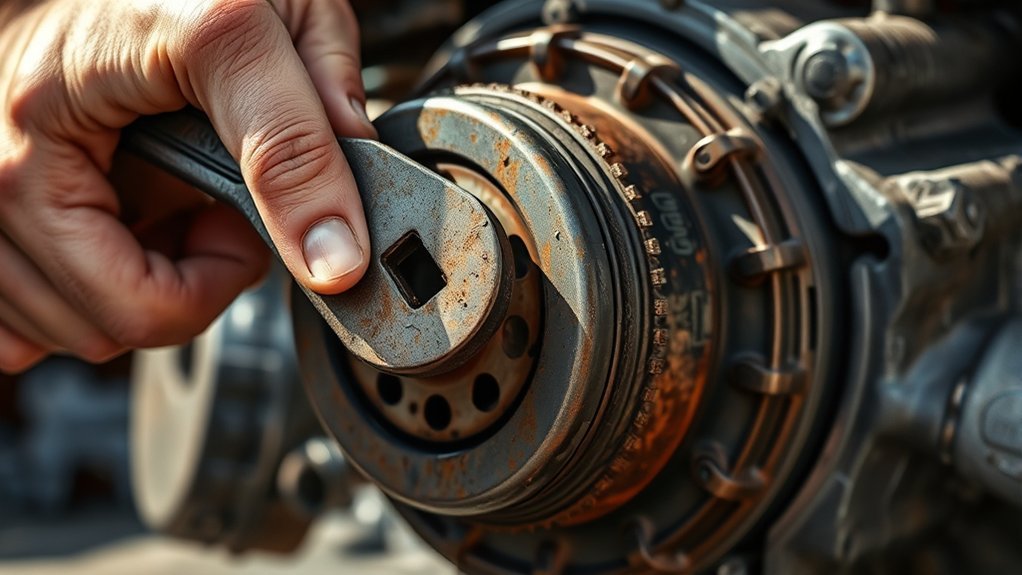
Removing the Fan Clutch Bolt Using Common Tools
First, identify the type of bolt securing the fan clutch to determine the best approach. You can use adjustable wrenches to fit various bolt sizes if you don’t have a socket set handy.
Applying penetrating oil before attempting removal will help loosen any rust or debris, making the process smoother.
Identifying Bolt Type
How do you determine the correct bolt type securing the fan clutch without specialized tools? Start by visually inspecting the bolt head for markings or shape, which gives clues about the bolt type. Next, test-fit common hand tools to check tool compatibility. Follow these steps:
- Identify the bolt head shape, such as hex, Torx, or spline, to narrow tool options.
- Measure the bolt head size using a caliper or ruler for accurate tool matching.
- Check for any corrosion or damage that might affect grip and tool choice.
Using Adjustable Wrenches
Why reach for specialized tools when an adjustable wrench can often get the job done? Adjustable wrenches provide a versatile grip on various bolt sizes, making them effective tool substitutes for removing fan clutch bolts.
First, ensure your wrench jaw is tightly adjusted to the bolt head to prevent slipping and rounding. Position the wrench so you apply force counterclockwise, loosening the bolt with steady pressure.
Use a wrench with a comfortable handle to maximize torque without straining your hand. Although adjustable wrenches aren’t designed specifically for fan clutch bolts, their adaptability makes them reliable when the proper specialized tool isn’t available.
Always maintain control and avoid sudden jerks to protect both the wrench and bolt during removal.
Applying Penetrating Oil
If your adjustable wrench isn’t loosening the fan clutch bolt, applying penetrating oil can help break down rust and corrosion that cause stubborn fastening. This method is essential when traditional two word ideas like “tight grip” fail. Follow these steps:
- Clean the bolt surface to remove dirt and grease, ensuring oil penetrates effectively.
- Spray a generous amount of penetrating oil directly onto the bolt and let it soak for at least 15 minutes. For severe cases, repeat application or wait longer.
- After soaking, attempt loosening the bolt again with your adjustable wrench.
Avoid unrelated topic distractions and focus on precise application. Penetrating oil weakens rust bonds, making removal easier without specialized tools. This practical approach saves time and effort when dealing with seized fan clutch bolts.
What to Do If the Fan Clutch Won’t Budge?
When the fan clutch won’t budge despite your efforts, applying penetrating oil to the mounting bolts and letting it sit for several minutes can help loosen seized threads. Afterward, use a breaker bar or a sturdy wrench for better leverage.
If it still resists, try gently tapping the clutch hub with a rubber mallet to break corrosion bonds. Avoid distractions like irrelevant topic discussions or random chatter while working, as focus is critical.
You might also consider heating the mounting area cautiously with a heat gun to expand the metal and ease removal. Remember, applying controlled, incremental force is better than sudden, excessive torque, which risks damage.
If these steps fail, the clutch may require professional removal tools or assistance to prevent part damage.
Safety Tips When Removing a Fan Clutch Without Tools
A crucial step before attempting to remove a fan clutch without specialized tools is prioritizing your safety. Maintaining safety awareness helps prevent injury and damage when relying on tool alternatives. Follow these safety tips:
- Wear protective gear: Use gloves and safety glasses to protect your hands and eyes from sharp edges and debris.
- Secure the engine: Ensure the engine is off, cooled down, and the vehicle is stable to avoid unexpected movement or burns.
- Use proper leverage: When employing tool alternatives like adjustable wrenches or pry bars, apply steady, controlled force to avoid slips or sudden releases.
How to Reinstall the Fan Clutch Without Causing Damage
– Reinstalling the fan clutch, make sure the threads are properly aligned to avoid cross-threading. Start threading by hand to ensure a smooth fit before applying any torque.
Tighten the clutch firmly but avoid overforcing, which can damage the threads or the clutch itself.
Align Threads Properly
How can you guarantee the fan clutch threads engage correctly without cross-threading? Avoiding irrelevant tangent or unrelated speculation is key. Focus solely on proper alignment techniques.
First, visually inspect both the clutch and shaft threads for damage or debris. Second, position the clutch squarely onto the shaft, ensuring the threads meet flush before turning.
Third, rotate the clutch gently by hand, feeling for smooth engagement; if resistance or misalignment occurs, stop immediately and realign. This method prevents thread damage, ensuring a secure fit and proper function.
Skipping these steps invites cross-threading, which compromises component integrity and can lead to costly repairs. Staying methodical and precise here sets the foundation for successful reinstallation without causing damage.
Tighten Without Overforcing
Why should you avoid over-tightening the fan clutch during reinstallation? Excessive force can cause irreversible damage to the clutch or threads, compromising its function and safety. Without the proper tool, you must rely on tool alternatives like hand tightening or using adjustable wrenches with care.
| Tightening Method | Recommended Torque | Risk Level |
|---|---|---|
| Hand Tightening | Moderate, controlled | Low |
| Adjustable Wrench | Use minimal force | Medium |
| Improvised Tools | Avoid excessive force | High |
Use gradual tightening, ensuring the clutch seats evenly. Stop as soon as resistance increases markedly. Overforcing leads to stripped threads or warped components, which are costly to repair. Always prioritize precision over brute strength for a safe, durable reinstallation.
Frequently Asked Questions
What Symptoms Indicate a Failing Fan Clutch?
If your engine sounds like a jet engine at idle, your cooling fan clutch might be failing. You’ll notice a loose idle belt, overheating, or poor A/C performance. These are signs the fan clutch isn’t engaging properly or spinning freely.
How Often Should a Fan Clutch Be Replaced?
You should replace the fan clutch every 60,000 to 100,000 miles or if you notice poor fuel economy.
Test soundness by checking for excessive play or unusual noise while the engine runs, indicating inefficiency.
Can a Faulty Fan Clutch Cause Engine Overheating?
Yes, a faulty fan clutch can cause engine overheating by failing to regulate cooling fan speed properly. This causes insufficient airflow, leading to temperature spikes.
You need a two word discussion airflow control and temperature regulation focus.
What Are the Signs of a Properly Working Fan Clutch?
You’ll notice consistent fan clutch performance with smooth engagement and disengagement, maintaining proper engine cooling symptoms like stable temperature and no overheating.
Minimal fan noise and vibration also indicate the clutch is functioning correctly.
Is It Safe to Drive With a Damaged Fan Clutch?
Don’t beat around the bush, it’s not safe to drive with a damaged fan clutch. It can accelerate drive belt wear and restrict radiator access, causing overheating and potential engine damage.
Get it fixed promptly to avoid costly repairs.