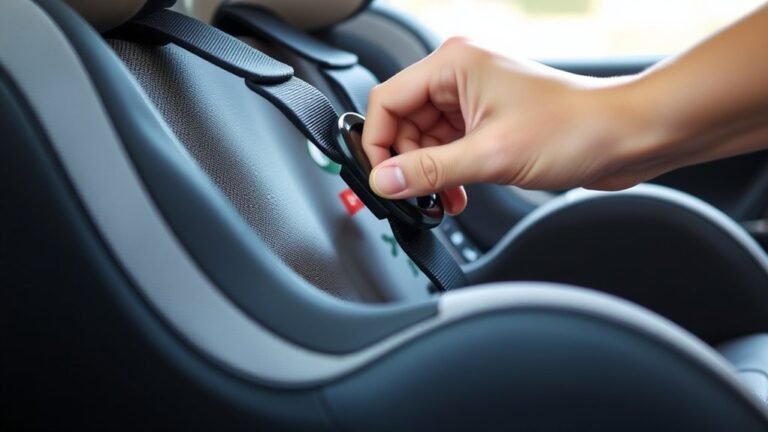
How to Take Out a Car Seat
To take out a car seat, first identify its type by checking the label and installation method, whether it uses the vehicle seat belt or LATCH anchors. Gather the necessary tools like a wrench or screwdriver before you begin.
Park your vehicle on a flat surface and clear the area around the seat. Unbuckle the harnesses and release any clips securing the car seat.
Carefully detach the anchors or seat belts without forcing them to avoid damage. Inspect the car seat and vehicle anchors to ensure all parts are free and clean after removal.
Follow these steps closely to ensure a smooth process. You can also explore tips for handling common challenges and proper post-removal care.
How to Identify Your Car Seat and Installation Type
How can you quickly determine the type of car seat you have and how it’s installed? Start by using identification methods such as checking the label on the seat, which typically states whether it’s rear-facing, forward-facing, or a booster seat. The model number and manufacture date can also help you verify its classification.
Next, examine the installation types. Most car seats are secured either with the vehicle’s seat belt or the LATCH (Lower Anchors and Tethers for Children) system. Look for metal anchors between the seat cushions or tether straps at the back of the seat.
Understanding these installation types ensures you can proceed confidently when removing or reinstalling the seat. Mastering these basics simplifies the process and enhances your safety awareness.
Get Your Tools Ready and Prepare Your Car
Before you start removing the car seat, gather the necessary tools to make the process smoother and safer. Getting started with a clear tool checklist will save you time and frustration. Typically, you’ll need a wrench or socket set, screwdriver, and possibly pliers, depending on your car seat model and car type. Check your vehicle’s manual and the car seat instructions to confirm specific tools.
Next, prepare your car by parking it on a flat surface and engaging the parking brake to prevent movement. Remove any items blocking access to the seat, such as floor mats or loose objects. Ensuring your workspace is clear will help you work efficiently and avoid damage. With tools ready and your car prepared, you’re set for the next steps in safely removing the car seat.
How to Safely Remove Your Car Seat Step-by-Step
With your tools ready and your car prepared, you can begin removing the car seat carefully and methodically. First, consult your car seat manual to identify the specific release mechanisms. Unbuckle the harness and detach any clips securing the seat to the vehicle.
Next, loosen and remove the lower anchors or seat belt holding the car seat in place. Keep an eye out for common installation mistakes to avoid, such as forcing the seat or neglecting to fully disengage locking clips.
Use steady, controlled movements to prevent damage to your vehicle or the car seat. As you proceed, follow these tips for carseat removal safety: maintain a clear workspace, wear gloves if needed, and double-check that no parts remain latched. This ensures a smooth, safe removal every time.
Solving Common Problems When Removing a Car Seat
Although removing a car seat might seem straightforward, you can encounter several common challenges that complicate the process. Stubborn latch connectors, tangled straps, or hard-to-reach bolts often cause delays.
When facing resistance, avoid unrelated tips or unused topic ideas that don’t address your specific issue. Instead, focus on the car seat manual for unlocking mechanisms or inspect the anchor points closely.
If straps are jammed, gently wiggle rather than force them to prevent damage. For tight bolts, a proper wrench size is essential to avoid stripping.
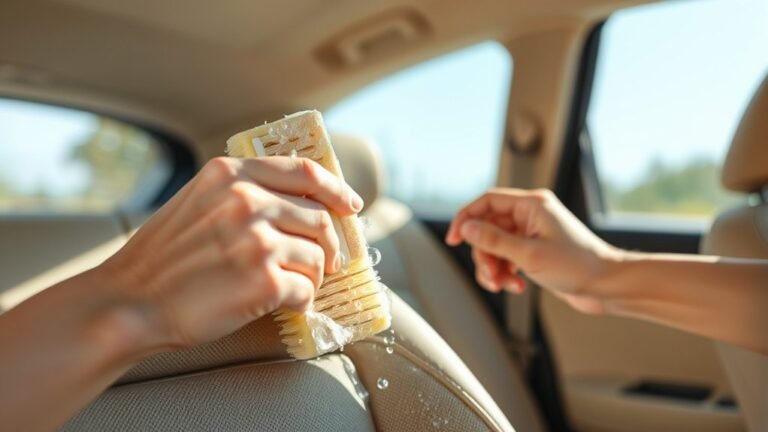
Cleaning and Maintaining Your Car Seat After Removal
How often should you clean your car seat once it’s removed? Regular cleaning after removal is essential to maintain its safety and appearance. Aim to clean it thoroughly every few months or immediately if you notice spills or stains. Prioritize stain prevention by treating spots as soon as they occur.
Clean your car seat thoroughly every few months or immediately after spills to maintain safety and appearance.
To effectively clean and maintain your car seat after removal:
- Use mild soap and warm water for fabric areas; avoid harsh chemicals.
- Vacuum crevices to remove crumbs and debris.
- Spot-clean stains promptly with appropriate cleaners.
- Air-dry the seat completely before reinstalling to prevent mold.
- Inspect straps and buckles for wear and tear during cleaning after removal.
Following these steps ensures your car seat remains safe, clean, and reliable over time.
What to Do With Your Old Car Seat After Removal
Once you remove your old car seat, consider donation options nearby to extend its life safely. If the seat is no longer usable, look into recycling programs that handle car seat materials properly.
Alternatively, you can repurpose parts of the seat for practical projects around your home.
Donation Options Nearby
Wondering what to do with your old car seat after removal? Exploring donation options nearby is a responsible choice. Donating your car seat can help families in need while keeping usable seats out of landfills.
Before donating, ensure the seat meets safety standards and isn’t expired or damaged.
Here are some nearby services you can consider for donation:
- Local charities accepting gently used car seats
- Fire stations offering car seat donation programs
- Hospitals or clinics with child safety initiatives
- Nonprofit organizations specializing in child welfare
- Community centers hosting baby gear drives
Check each organization’s guidelines to confirm they accept car seats. By choosing these donation options, you contribute to safety and sustainability in your community.
Recycling Car Seat Materials
When dealing with an old car seat, recycling its materials offers an eco-friendly alternative to disposal. You can contribute to environmental conservation by focusing on recycling carseat components such as metal frames, plastic shells, and fabric covers.
Start by separating these parts to streamline the recycling process. Many local recycling centers accept car seat materials, so check with them for specific guidelines. Avoid sending the entire seat to landfill when you can opt for eco friendly disposal methods.
Properly recycling these components reduces waste and prevents harmful chemicals from entering the environment. By taking these steps, you ensure your old car seat is handled responsibly, supporting sustainability efforts while clearing out your vehicle safely and efficiently.
Repurposing Old Seats
Recycling car seat materials is a great way to reduce waste, but you might also consider giving your old car seat a new purpose. By upcycling fabrics and recycling plastics, you can extend the life of the materials and support sustainability.
Here are practical ideas for repurposing old seats after removal:
- Create pet beds using the cushioned fabric and padding.
- Convert the plastic frame into storage bins or organizers.
- Use the straps and buckles for DIY securing straps or garden ties.
- Donate the seat to community art projects or schools for craft materials.
- Transform the seat cover into reusable shopping bags or cushion covers.
These options let you minimize environmental impact while creatively reusing your car seat’s components.
Frequently Asked Questions
How Often Should Car Seats Be Replaced?
You should replace car seats every six to ten years, depending on the manufacturer. Always perform latch checks and retracking straps regularly to guarantee safety.
Expired seats can fail, so stay vigilant and update promptly.
Are There Laws About How Long to Keep a Car Seat?
Yes, you must follow laws about expiration dates to ensure safety. Always check for safety recalls before using a car seat.
Keeping your seat updated protects your child and complies with legal requirements.
Can Car Seats Be Reused for Multiple Children?
When it comes to reusing seats, don’t put all your eggs in one basket. Car seats can be reused if they haven’t expired or been in an accident. Always prioritize safety concerns by checking manufacturer guidelines before reuse.
What Are the Safest Car Seat Brands?
You’ll find the safest brands include Graco, Britax, and Chicco, known for crash tested designs that prioritize protection.
Choose models with top safety ratings to guarantee your child’s security during every ride.
How to Install a Car Seat Correctly After Removal?
You’ll install the car seat correctly by securing the base tightly, checking for minimal movement.
Clean straps gently with mild soap and water. Store the base in a dry place to prevent damage, ensuring safety and longevity.
Conclusion
Now that you’ve mastered the steps to safely remove your car seat, imagine the ease of a clutter-free backseat and the confidence of handling any stubborn buckle or latch.
With your tools ready and knowledge in hand, you’re set to breeze through removal without a hitch. Remember, a clean, well-maintained seat lasts longer, and knowing what to do next with the old one keeps you prepared.
Ready to take control? Let’s get started with how to take out a car seat.