How to Replace Wheel Covers
To replace wheel covers, first gather essential tools like a flathead screwdriver and gloves. Replacing wheel covers starts with carefully prying off the old ones to avoid damaging your wheels.
Next, clean your wheels thoroughly to ensure the new covers fit well and look great. Choose new covers that match your tire size and style for the best appearance and performance.
Align the valve stem cutout on the cover, then press the cover evenly to snap it into place. Check the clips to make sure the cover is securely attached.
If you encounter issues such as loose covers or uneven fit, there are simple fixes to help resolve these problems. Keep going to uncover tips for a perfect installation.
Key Takeaways
- Use a flathead screwdriver or plastic pry tool to gently pry off the old wheel covers, wearing gloves for protection.
- Clean the wheel surface thoroughly with soap and water, removing dirt and debris before installing new covers.
- Match the replacement covers to your wheel size and attachment type, ensuring proper fit and style compatibility.
- Align the valve stem cutout and press the cover firmly and evenly around edges to snap it securely into place.
- Regularly inspect clips and cover condition, replacing damaged parts and maintaining cleanliness for long-lasting fit.
How to Identify When Wheel Covers Need Replacing
How do you know when it’s time to replace your wheel covers? First, check for visible damage like cracks, dents, or missing pieces. These not only look bad but can also affect how well the cover stays on.
If you notice your wheel covers are loose or keep falling off, it’s a clear sign they’ve worn out or the clips have weakened. Fading or discoloration from sun exposure is another clue; while cosmetic, it can make your car look neglected.
Also, if your wheel covers don’t fit snugly or have started to rattle while driving, it’s time to swap them out. Keeping an eye on these signs ensures your car stays stylish and your wheel covers function properly.
Tools Needed to Swap Wheel Covers
To swap wheel covers efficiently, you’ll need a few basic tools on hand. First, a flathead screwdriver or a plastic pry tool helps gently pop off the old wheel covers without damaging the rims.
A flathead screwdriver or plastic pry tool helps gently remove old wheel covers without harming the rims.
You’ll also want a pair of gloves to protect your hands from sharp edges and dirt. A clean cloth is useful to wipe the wheel surface before installing new covers, ensuring a secure fit.
If your wheel covers are secured with lug nuts, having a lug wrench or socket set ready is essential. Finally, a small flashlight can come in handy if you’re working in dim lighting.
These tools will make the process smoother and prevent unnecessary damage during removal and installation.
How to Choose the Right Replacement Wheel Covers
What factors should you consider when picking replacement wheel covers? First, match the size. Check your tire’s diameter, usually 14 to 17 inches, to ensure a perfect fit.
Next, consider the material. Plastic covers are affordable and lightweight, while metal ones offer durability but cost more.
Style matters too. Choose a design that complements your vehicle’s look, whether sleek, sporty, or classic.
Also, pay attention to the attachment method. Some snap on, others require lug nuts, so pick one compatible with your wheels.
Finally, consider your budget and quality balance. Buying cheap covers might save money initially but could wear out faster. By weighing these factors, you’ll confidently select wheel covers that fit well, last long, and enhance your car’s appearance.
How to Remove Old Wheel Covers
Before you remove your old wheel covers, make sure you have the right tools and follow basic safety steps to avoid injury.
You’ll want to use techniques that protect both the wheel and the cover during removal. Let’s go over what you’ll need and how to do it safely.
Tools Needed
How do you get started with removing old wheel covers efficiently? First, gather the essential tools to make the job easier and prevent damage. You’ll need a flathead screwdriver or a specialized wheel cover removal tool to pry the covers off gently.
A pair of gloves will protect your hands from sharp edges and grime. Having a clean cloth handy helps wipe away dirt and inspect the wheel area once the cover is off.
If the wheel covers are stubborn, a rubber mallet can help tap them loose without causing damage. Finally, a flashlight might come in handy if you’re working in low light.
With these tools ready, you’ll remove old wheel covers quickly and prepare for replacing them smoothly.
Safety Precautions
Having the right tools on hand will make removing old wheel covers much easier, but it’s just as important to prioritize your safety throughout the process. Always wear gloves to protect your hands from sharp edges or debris.
Make sure the vehicle is parked on a flat surface and the parking brake is engaged to prevent any movement. Avoid working near busy roads or in poor lighting conditions.
Use eye protection to shield against any flying dirt or rust particles. Never use excessive force, as this can cause injury or damage.
Keep your tools organized and within reach to avoid unnecessary distractions. By following these safety precautions, you’ll reduce the risk of accidents and ensure a smooth, safe removal of your old wheel covers.
Removal Techniques
Removing old wheel covers requires a careful approach to avoid damaging the wheel or the cover itself. Start by locating the notch or gap on the wheel cover designed for removal.
Use a flathead screwdriver or a specialized wheel cover removal tool, inserting it gently into the gap. Pry the cover away from the wheel with slow, steady pressure to prevent cracking or bending.
Work your way around the cover, loosening it evenly until it pops off. If the cover is held by clips, be mindful not to force them too hard.
For stubborn covers, applying a little lubricant around the edges can help. Once removed, inspect the wheel and cover for damage before installing the new wheel cover.
How to Clean Wheels Before Installing Covers
Before putting on new wheel covers, you’ll want to remove any dirt and grime from the wheels. Choosing the right cleaner makes this task easier and protects your wheels from damage.
Let’s look at how to get your wheels spotless and ready for the covers.
Removing Dirt And Grime
Why should you clean your wheels thoroughly before installing wheel covers? Dirt and grime can prevent wheel covers from fitting securely, leading to rattling or even falling off while driving.
To remove buildup, start by rinsing your wheels with water to loosen loose debris. Then, use a stiff brush or sponge to scrub the surface, focusing on crevices and lug nut areas where dirt accumulates. Don’t forget to clean inside the wheel wells as well.
After scrubbing, rinse thoroughly to wash away loosened grime. Dry the wheels completely with a clean cloth to avoid moisture trapping under the covers, which can cause rust or damage.
Taking these steps ensures a snug, long-lasting fit for your wheel covers.
Choosing The Right Cleaner
How do you pick the best cleaner to prepare your wheels for new covers? Start by choosing a product designed specifically for wheels, as these cleaners target brake dust, grease, and grime without harming the finish.
Avoid harsh chemicals like acids or bleach, which can damage your rims or cause discoloration. A pH-balanced cleaner is ideal because it’s strong enough to remove dirt but gentle on your wheels.
If you prefer eco-friendly options, look for biodegradable formulas that still offer effective cleaning. Always check the label to ensure compatibility with your wheel material, whether steel or alloy.
Using the right cleaner makes a big difference, ensuring your wheels are spotless and ready for a secure, long-lasting fit with your new covers.
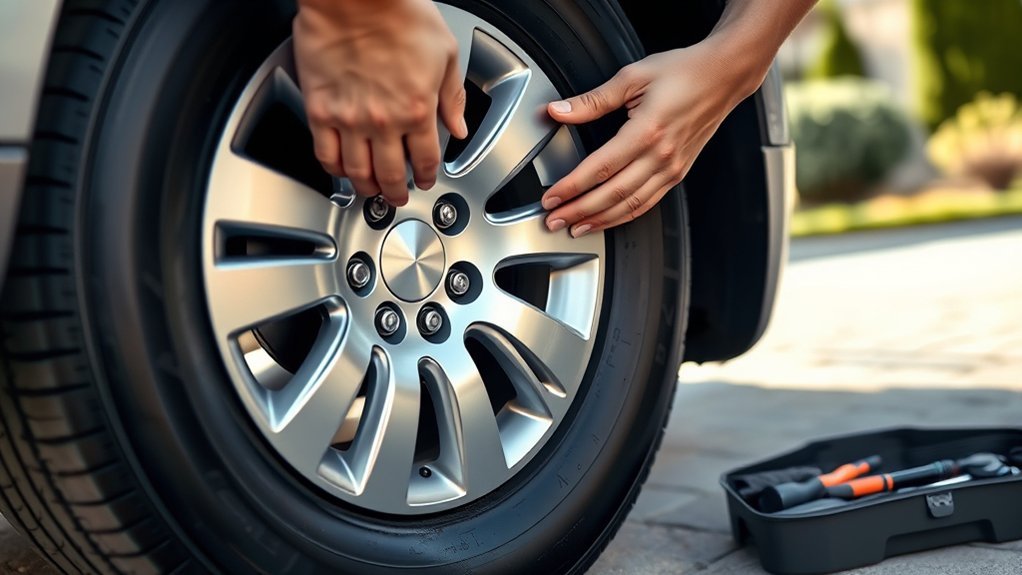
How to Align and Attach New Wheel Covers
Where should you start when attaching new wheel covers? Begin by aligning the wheel cover’s clips with the wheel rim’s edge. Hold the cover firmly and position it so the valve stem cutout matches the tire’s valve stem. This guarantees proper fit and access.
Once aligned, press the cover evenly against the wheel, applying steady pressure around the edges. Avoid pushing too hard in one spot to prevent damage. You’ll feel or hear the clips snap into place as the cover secures itself.
After attaching, spin the wheel slowly to confirm the cover sits evenly and doesn’t wobble. If it feels loose, double-check the alignment and press the clips again until they lock firmly. This straightforward process keeps your wheels looking sharp and secure.
Fixing Wheel Cover Fit Problems
Struggling with a loose or uneven wheel cover can be frustrating, but you can usually fix the issue quickly. First, check if the clips or retention ring are damaged or bent. If so, gently reshape or replace them to ensure a snug fit.
Next, clean the wheel rim to remove dirt or debris that might prevent proper seating. You should also inspect the wheel cover for cracks or warping; replacing a damaged cover often solves fit problems.
When reinstalling, align the valve stem cutout correctly to avoid uneven pressure. Press firmly and evenly around the cover’s edges to snap it into place.
If the cover still feels loose, consider using a thin foam tape or rubber gasket inside the rim to improve grip and prevent rattling.
Troubleshooting Wheel Cover Installation Issues
Once you’ve ensured the wheel cover and clips fit properly, you might still face installation challenges. Common issues include covers not snapping on securely, uneven alignment, or clips popping off during driving. To troubleshoot, double-check clip condition, clean the wheel surface, and apply even pressure during installation.
| Issue | Solution |
|---|---|
| Cover won’t snap on | Inspect and replace broken clips |
| Uneven fit or gaps | Align cover carefully, apply firm pressure evenly |
| Clips keep popping off | Use stronger clips or adhesive |
| Scratches or damage during install | Use a soft cloth to protect surface |
Addressing these problems early ensures your wheel covers stay in place, maintaining both appearance and safety.
How to Maintain Wheel Covers for Long-Lasting Use
How often do you check your wheel covers for damage or dirt? Regular inspections help you spot cracks, scratches, or loose fittings early.
Clean your wheel covers every couple of weeks using a soft cloth, mild soap, and water to remove dirt and brake dust. Avoid harsh chemicals that can degrade the plastic or paint. After washing, dry them thoroughly to prevent water spots.
If you notice any damage, repair or replace the cover promptly to avoid further issues. When parking, try to avoid curbs and rough terrain that can scratch or crack your covers.
Finally, store spare wheel covers in a cool, dry place to keep them in good condition. Consistent care ensures your wheel covers stay attractive and functional longer.
Frequently Asked Questions
Can I Replace Wheel Covers Without Removing the Tires?
Yes, you can replace wheel covers without removing the tires. Just make sure the vehicle is parked securely, then gently pry off the old covers and snap the new ones into place without needing to take the tires off.
Are Wheel Covers Legal in All States?
You’ll find wheel covers are legal in all states, but some places have specific rules about size or reflectivity. Always check your local laws to make sure your wheel covers comply and keep you safe on the road.
How Do Wheel Covers Affect Fuel Efficiency?
Wheel covers can slightly improve your fuel efficiency by reducing aerodynamic drag on your wheels. While the effect is minimal, they help streamline airflow, so you’ll notice a small boost in mileage, especially at higher speeds.
Can Wheel Covers Prevent Tire Damage?
About 70% of tire damage comes from curb impacts. While wheel covers don’t fully prevent tire damage, they do protect your rims from scratches and minor impacts. This helps maintain your wheels’ appearance and integrity over time.
Do Wheel Covers Impact Vehicle Insurance Rates?
No, wheel covers don’t impact your vehicle insurance rates. Insurers focus on your driving record, car model, and coverage type, so adding or replacing wheel covers won’t change your premiums or affect how much you pay.
Conclusion
So, now that you’re a wheel cover whisperer, remember: replacing them isn’t rocket science—it’s just a fancy way to say “make your wheels look less sad.” If your old covers look like they survived a demolition derby, it’s time for an upgrade.
Grab your tools, channel your inner mechanic, and slap on those shiny new covers like a pro. Your wheels will thank you—probably with a smoother ride or at least fewer weird stares.
When it comes to maintaining your car’s appearance, knowing how to replace wheel covers is a simple but effective skill that makes a big difference.