How to Install Wheel Studs
To install wheel studs, start by safely lifting and securing your vehicle using jack stands on a flat surface with wheel chocks in place. This ensures stability while you work.
Next, remove the wheel and take out the damaged studs. Clean the hub thoroughly to prepare for the new studs.
Insert the new studs from the back of the hub. Use a washer and lug nut to pull each stud fully into place.
Tighten the lug nuts gradually to seat the studs properly. Then, use a torque wrench to tighten them to the manufacturer’s specifications in a star pattern.
Keep an eye on alignment and a secure fit throughout the process to avoid common issues. You’ll find detailed tips for each step ahead.
Key Takeaways
- Safely lift and secure the vehicle using jack stands and wheel chocks before removing the wheel for stud replacement.
- Remove damaged studs by applying penetrating oil and using a hammer or specialized tool to push them out from the hub.
- Clean the hub thoroughly with a wire brush and brake cleaner, ensuring stud holes are free of debris and undamaged.
- Insert new studs from the back, use a washer and lug nut to pull them fully into the hub, tightening gradually and evenly.
- Torque new studs to manufacturer specifications using a calibrated torque wrench and a crisscross/star pattern, rechecking torque after driving.
How to Safely Lift and Secure Your Vehicle
How do you safely lift and secure your vehicle before working on it? First, park on a flat, stable surface and engage the parking brake to prevent any movement.
Park on a flat surface and engage the parking brake to ensure your vehicle stays secure before lifting.
Next, place wheel chocks behind the wheels that will stay on the ground. Locate your vehicle’s recommended jacking points, usually found in the owner’s manual or marked on the frame.
Use a reliable hydraulic floor jack to lift the vehicle at these points, raising it just enough to remove the wheel. Once lifted, position sturdy jack stands under the frame or designated support areas, then slowly lower the vehicle onto them.
Never rely solely on the jack to hold the vehicle. Double-check stability before you crawl underneath or remove the wheels to ensure your safety throughout the installation.
How to Choose the Right Tools for Installing Wheel Studs
Selecting the right tools guarantees a smooth and safe wheel stud installation. You’ll need a few essentials: a hammer or stud installer tool to drive the studs in, a lug wrench or impact wrench to tighten the lug nuts, and a torque wrench to ensure proper tightness.
Don’t forget a punch or drift pin to help remove old studs if necessary. A breaker bar can provide extra leverage for stubborn bolts. Using the correct size sockets and wrenches is essential to avoid damaging the studs or lug nuts.
Also, having penetrating oil handy can ease the removal and installation process. By preparing these tools beforehand, you’ll work efficiently and reduce the risk of damaging your vehicle or injuring yourself.
How to Inspect and Remove Damaged Wheel Studs
Why should you carefully inspect your wheel studs before replacing them? Because damaged studs can compromise your vehicle’s safety and cause uneven wheel torque. Start by checking each stud for any signs of wear, rust, bending, or stripped threads.
Use a flashlight to spot cracks or corrosion that might not be obvious at first glance. Once you identify damaged studs, safely lift the vehicle and remove the wheel.
Use a hammer or a specialized tool to push or pull the faulty stud out of the hub. If it’s stuck, applying penetrating oil can help loosen it.
Removing all damaged studs thoroughly ensures a secure fit for the new ones, preventing future wheel issues and keeping your vehicle safe on the road.
How to Prepare the Hub for New Wheel Studs
Where do you begin when getting the hub ready for new wheel studs? First, clean the hub thoroughly to remove dirt, grease, and rust that could interfere with stud installation. Use a wire brush and brake cleaner for this task.
Next, inspect the hub’s holes where the studs will go. Make sure they’re free of debris and not damaged. If you spot corrosion or buildup inside the holes, use a small punch or pick to clear it out carefully. Avoid enlarging the holes, as that can weaken stud grip.
Finally, check the hub surface for flatness and damage to ensure the wheel will sit properly. Taking these steps will help your new wheel studs fit securely and function safely.
How to Install New Wheel Studs Step-by-Step
ensure a proper fit
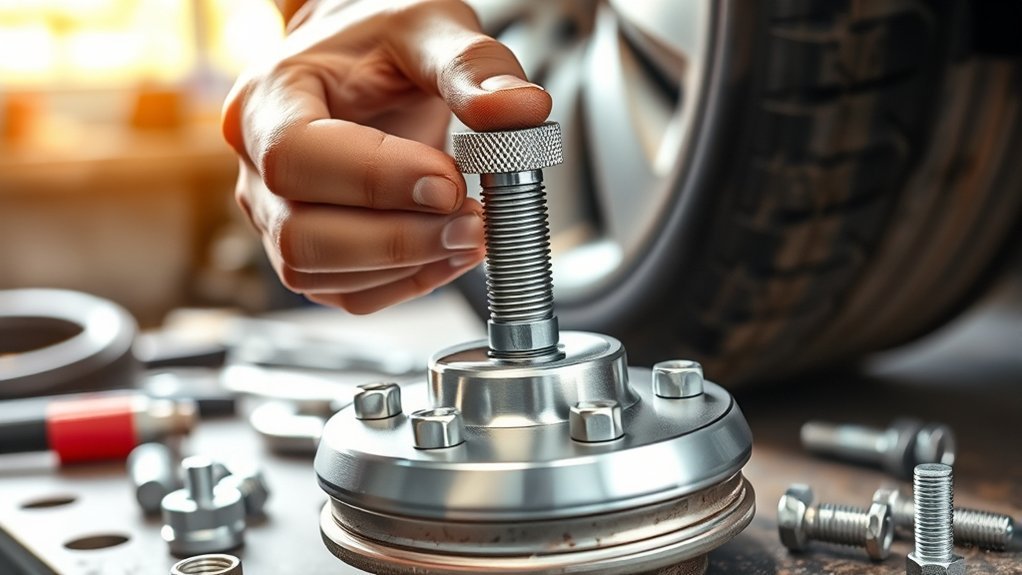
Installing new wheel studs is a straightforward process that you can complete with basic tools and a bit of patience. After prepping the hub, you’ll insert each new stud carefully to ensure a proper fit. Here’s how to do it step-by-step:
Place the new stud through the hole in the hub from the back side. Use a washer and lug nut on the front side to pull the stud fully into the hub.
Insert the new stud from the back, then use a washer and lug nut to pull it firmly into place.
Tighten the lug nut gradually, making sure the stud seats evenly without bending. Repeat the process for each wheel stud until all are securely installed.
Once all studs are seated, remove the lug nuts and washers. Your wheel studs are now ready for the wheel installation.
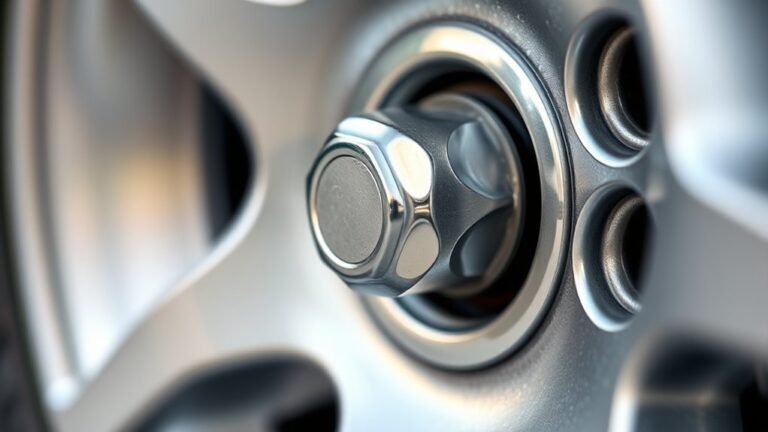
How to Check Wheel Stud Alignment and Fit
How can you be sure your new wheel studs fit perfectly and are properly aligned? First, visually inspect each stud to confirm it’s seated flush against the hub without any gaps.
Next, slide a lug nut onto each stud by hand. If it threads smoothly without resistance, the alignment is good. If you notice cross-threading or difficulty, the stud may be misaligned or damaged.
Also, check that each stud is perpendicular to the hub surface; any tilt can cause uneven wheel mounting. Finally, place the wheel onto the studs to ensure it fits snugly without forcing it.
Taking these steps guarantees your wheel studs are correctly positioned and ready for safe use, preventing future issues with your wheels.
How to Torque Wheel Studs Correctly
Now that your wheel studs are aligned and fitted, you need to torque them to the proper specifications to ensure safety. Follow the correct torque sequence to avoid warping the wheel or hub.
Always use a torque wrench to get the exact tightness required.
Proper Torque Specifications
Proper torque specifications guarantee your wheel studs hold the wheels securely and prevent damage to the studs or hub. When tightening wheel studs, you need to follow the manufacturer’s recommended torque values exactly.
Over-tightening can strip threads or warp the brake rotor, while under-tightening risks the wheel coming loose. Use a calibrated torque wrench to apply consistent force. Remember to recheck torque after driving a short distance to ensure nothing has loosened.
Keep these tips in mind for proper torque:
- Always consult your vehicle’s service manual for exact torque specs
- Tighten studs gradually, in multiple passes if necessary
- Avoid using impact guns for final torque; use a torque wrench instead
- Apply anti-seize compound sparingly to avoid altering torque readings
Torque Sequence Importance
Why does the order in which you tighten wheel studs matter? Tightening wheel studs in the correct sequence ensures even pressure distribution across the wheel. If you tighten them unevenly, you risk warping the brake rotor or creating an imbalance that can cause vibrations while driving.
Start by snugging the studs in a crisscross or star pattern rather than going around in a circle. This method prevents one side from pulling the wheel unevenly. By following the proper sequence, you’ll avoid damaging the studs or wheel hub and ensure the wheel sits flush against the hub surface.
This careful approach helps maintain vehicle safety, extends the life of your components, and prevents loosening during operation. Always prioritize the torque sequence before moving to the final tightening step.
Using a Torque Wrench
Although tightening wheel studs by hand sets the stage, you need a torque wrench to achieve the exact tightness required for safety and performance. Using a torque wrench ensures you don’t overtighten or undertighten the studs, which could lead to brake issues or wheel detachment.
Follow these steps for proper torque application:
- Check your vehicle’s manual for the correct torque specification.
- Set your torque wrench to the recommended value.
- Tighten the studs in a star or crisscross pattern to distribute pressure evenly.
- Stop tightening once the wrench clicks or indicates you’ve reached the preset torque.
Fixing Common Wheel Stud Installation Problems
How can you tell if your wheel studs aren’t installed correctly? Signs include loose wheels, uneven torque, or damaged threads. If you notice any, address them immediately to avoid safety risks. Common problems often stem from improper alignment, insufficient torque, or using the wrong tools.
Here’s a quick reference to fix these issues:
| Problem | Cause | Solution |
|---|---|---|
| Loose wheel | Under-torqued studs | Use a calibrated torque wrench |
| Damaged threads | Cross-threading | Replace studs, clean holes |
| Misaligned studs | Poor installation technique | Realign studs before tightening |
Always inspect studs carefully and follow the manufacturer’s torque specs to ensure a secure and safe fit every time.
Frequently Asked Questions
Can I Install Wheel Studs on Any Vehicle Type?
You can install wheel studs on most vehicles, but you’ll need to check compatibility with your specific make and model. Some vehicles might require special tools or adapters, so always verify before starting the installation.
How Often Should Wheel Studs Be Replaced?
Wondering how often you should replace wheel studs? You should replace them whenever they show signs of wear, damage, or corrosion.
Don’t risk your safety. Inspect them regularly and swap them out if they’re compromised.
Are Aftermarket Wheel Studs Better Than OEM Studs?
Aftermarket wheel studs aren’t always better than OEM. You’ll want to choose based on quality, material, and fit.
OEM studs usually ensure reliability, but some aftermarket options offer stronger materials or improved designs for specific needs.
What Are the Signs of Failing Wheel Studs?
You’ll notice wobbling wheels, loose lug nuts, and uneven tire wear. You’ll hear unusual noises or feel vibrations while driving.
Don’t ignore rust, cracks, or stripped threads. They’re clear signs your wheel studs are failing.
Can Wheel Studs Affect Brake Performance?
Yes, wheel studs can affect brake performance because if they’re loose or damaged, your wheel may wobble, causing uneven brake pad wear and reduced braking efficiency.
You should always ensure your studs are secure for safe braking.
Conclusion
Now that you know how to lift your vehicle safely, choose the right tools, inspect and remove damaged studs, prepare the hub, install new studs, check alignment, and torque correctly, you’re ready to tackle the job confidently.
Remember to work carefully, check thoroughly, and tighten securely.
By following these steps, you’ll ensure a safe ride, a strong hold, and lasting performance every time you install wheel studs. Proper installation of wheel studs is key to maintaining vehicle safety and reliability.