How Do I Test Fuel Injectors
To test your fuel injectors, start by visually inspecting them for leaks, cracks, or dirt buildup. This initial check helps identify obvious issues that could affect performance.
Next, use a multimeter to measure the electrical resistance of each injector and compare it to your vehicle’s specifications. This will help determine if the injector’s internal coil is functioning properly.
Attach a noid light to the injector connector to verify if it receives proper electrical pulses from the engine control unit. While the engine idles, listen for consistent clicking sounds, which indicate the injectors are opening and closing correctly.
Optionally, use a fuel pressure gauge to check the overall fuel system pressure. You can also observe the spray patterns of the injectors to detect clogs or damage that might reduce fuel flow.
Keep going to uncover detailed steps and maintenance tips to ensure your fuel injectors perform at their best.
Key Takeaways
- Use a multimeter to measure injector resistance and compare it to the vehicle’s specified range for electrical integrity.
- Connect a noid light to the injector’s electrical connector to verify it receives proper pulse signals during engine cranking.
- Remove the injector and check the spray pattern by briefly activating it on a pressurized tester to observe fuel flow consistency.
- Listen for consistent clicking sounds from each injector with a mechanic’s stethoscope while the engine idles to ensure proper operation.
- Optionally, attach a fuel pressure gauge to the fuel rail to monitor system pressure and detect irregular fluctuations affecting injectors.
Common Signs Your Fuel Injectors Are Failing
How can you tell if your fuel injectors are failing? You’ll likely notice rough idling, where your engine feels uneven or shaky when stopped.
Poor acceleration is another sign; your car might hesitate or struggle when you press the gas. You could also experience decreased fuel efficiency, meaning you’re filling up more often than usual.
A strong fuel smell around your vehicle can indicate leaking injectors. Additionally, your check engine light might come on, signaling issues related to fuel delivery.
Misfires or engine knocking noises often point to injector problems, too. If you spot any of these signs, it’s a good idea to inspect your fuel injectors before the condition worsens and affects your vehicle’s performance or causes costly damage.
Tools You’ll Need to Test Fuel Injectors at Home
To test fuel injectors at home, you’ll need some essential diagnostic tools like a multimeter and fuel pressure gauge. Don’t forget safety gear such as gloves and eye protection to keep yourself safe.
You might also want a few optional accessories, like a cleaning kit, to make the job easier.
Essential Diagnostic Tools
Before you start testing fuel injectors, you’ll need the right diagnostic tools to get accurate results and avoid guesswork. First, a multimeter is essential for measuring electrical resistance and voltage at the injector terminals.
Next, a fuel pressure gauge helps you check if the fuel system maintains proper pressure, indicating injector performance. You’ll also want a noid light to verify if the injector is receiving the correct electrical pulse from the ECU.
Additionally, an injector cleaning kit can be handy for removing deposits during testing. Finally, a scan tool or OBD-II reader lets you monitor live data and check for error codes related to fuel injection.
With these tools, you’ll efficiently diagnose injector issues at home.
Safety Equipment Requirements
Testing fuel injectors involves working with fuel and electrical components, so having proper safety equipment is essential to protect yourself. You’ll want to minimize risks like fuel spills, electrical shocks, and eye injuries. Always wear gear designed for these hazards.
Here’s a quick list of must-have safety equipment:
| Equipment | Purpose |
|---|---|
| Safety Goggles | Protect eyes from fuel splashes |
| Nitrile Gloves | Guard hands from chemicals |
| Fire-Resistant Clothing | Prevent burns from fuel ignition |
| Respirator Mask | Avoid inhaling fuel fumes |
| Insulated Tools | Prevent electrical shocks |
Using these items keeps you safe while you test fuel injectors at home. Don’t skip this step; it’s crucial for your safety and success.
Optional Testing Accessories
Wearing the right safety gear sets a solid foundation for working on fuel injectors, but having the right tools can make the process much smoother. Optional testing accessories help you diagnose issues accurately and save time.
You don’t need expensive equipment, but a few key tools can boost your confidence and effectiveness.
Here are four essential accessories you’ll want:
- Multimeter – Check electrical resistance and continuity quickly.
- Fuel Pressure Gauge – Confirm the fuel system maintains proper pressure.
- Noid Light – Verify the injector’s electrical pulse without removing it.
- Injector Cleaning Kit – Remove clogs and improve performance during testing.
Using these tools, you’ll get a clearer picture of your fuel injectors’ condition and avoid unnecessary replacements.
Visual Inspection: What to Look For on Fuel Injectors
How can you tell if a fuel injector is showing signs of trouble just by looking at it? Start by examining the injector for obvious damage or wear. Check for cracks, leaks, and corrosion around the body and electrical connector.
Dirt buildup or clogged nozzles can also affect performance. Look closely at the O-rings; if they’re cracked or brittle, they might cause fuel leaks.
Here’s a quick checklist to guide your visual inspection:
| What to Look For | Possible Issue |
|---|---|
| Cracks or physical damage | Injector malfunction |
| Fuel leaks | Poor sealing or worn O-rings |
| Corrosion | Electrical connection issues |
| Dirt or carbon buildup | Clogged injector nozzles |
| Worn O-rings | Fuel leaks and pressure loss |
Spotting these signs early helps you decide if further testing is needed.
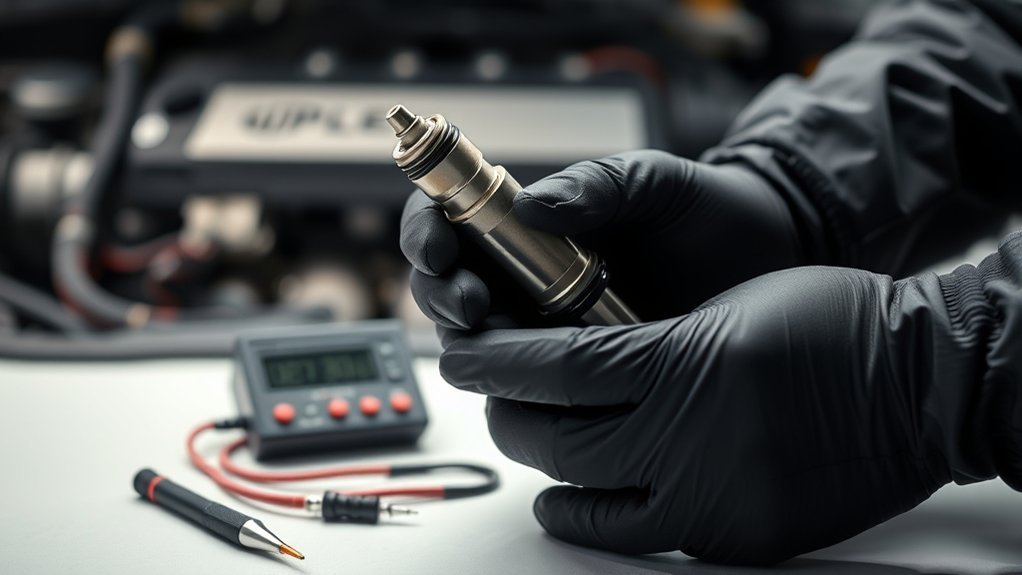
Testing Fuel Injector Resistance With a Multimeter
Once you’ve inspected the fuel injector visually and want to confirm its condition, measuring its electrical resistance with a multimeter can reveal internal issues. Here’s how to do it:
- Set your multimeter to the ohms (Ω) setting.
- Disconnect the fuel injector from the wiring harness to isolate it.
- Place the multimeter probes on the injector’s electrical terminals.
- Compare the reading to your vehicle’s specified resistance range, usually found in the service manual.
If the resistance is too high or low, the injector coil may be damaged, indicating a faulty injector. Testing resistance is a quick, reliable way to detect electrical problems before replacing parts, saving you time and money. Don’t skip this step; it’s crucial for accurate diagnosis.
Using a Fuel Injector Tester or Noid Light
To test your fuel injectors, start by preparing your fuel injector tester or noid light according to the instructions. Connect the noid light to the injector’s electrical connector to check for proper pulse signals.
Then, carefully interpret the test results to determine if your injectors are functioning correctly.
Preparing The Tester
Before you begin testing fuel injectors, you’ll need to set up your tester properly. Whether you’re using a fuel injector tester or a noid light, preparation is key to getting accurate results without frustration. Follow these steps to get started confidently:
- Check your tools Make sure your tester or noid light is in good working condition, with no damaged wires or connectors.
- Read the manual Understand your specific tester’s functions and settings to avoid mistakes.
- Power source Ensure your tester is fully charged or connected to a stable power source to prevent interruptions.
- Safety gear Wear safety glasses and gloves to protect yourself from fuel and electrical hazards.
With your tester prepared, you’re ready to move forward efficiently.
Connecting The Noid Light
Connecting the noid light is a straightforward step that lets you check if your fuel injector’s electrical circuit is functioning correctly. First, locate the fuel injector’s electrical connector and unplug it carefully. Then, plug the noid light into the connector where the wiring harness was attached.
Make sure the noid light fits securely to avoid false readings. Next, turn the ignition key to the “on” position without starting the engine. Watch the noid light as you crank the engine; it should flash or blink, indicating the injector is receiving an electrical pulse.
If the light doesn’t flash, double-check your connections and the vehicle’s wiring. This simple connection helps you quickly determine if the injector’s circuit is active before moving on to further testing steps.
Interpreting Test Results
Once you’ve connected the noid light or fuel injector tester, understanding what their signals mean will guide your next steps. These tools give you clear feedback on your fuel injector’s condition, helping you avoid guesswork.
Here’s what to watch for:
- Steady blinking light – Your injector’s firing correctly. Relief, right?
- No light or flicker – The injector isn’t getting power or is faulty. Time to investigate wiring or replace it.
- Rapid flashing – A short circuit may exist; this signals trouble.
- Irregular or weak pulses – The injector might be clogged or failing, meaning performance issues ahead.
Interpreting these results helps you act confidently, whether cleaning, repairing, or replacing your injectors.
Checking Fuel Injector Spray Pattern and Flow
To accurately check the fuel injector spray pattern and flow, you’ll need to observe how the injector distributes fuel under pressure. First, remove the injector from the engine and connect it to a fuel injector tester or a pressurized fuel source.
Activate the injector briefly and watch the spray. A healthy injector should produce a consistent, fine mist in a uniform pattern. Look for drips, heavy streams, or uneven sprays, which indicate clogging or damage.
Also, monitor the flow rate by measuring the volume of fuel sprayed over a set time. If the flow is too low or too high, the injector may be faulty. Checking spray pattern and flow helps ensure your injectors deliver fuel efficiently for optimal engine performance.
Listening for Fuel Injector Clicking Sounds
Although fuel injectors are small components, you can often tell if they’re working properly by listening for a distinct clicking sound while the engine runs. This rhythmic click means the injectors are opening and closing as they should, delivering fuel efficiently.
To listen effectively:
- Use a mechanic’s stethoscope or a long screwdriver as a listening tool.
- Place it gently on each injector while the engine idles.
- Focus on identifying a consistent, rapid clicking noise.
- Compare sounds between injectors to spot any irregularities or silence.
If you hear no clicking or an inconsistent pattern, it’s a strong sign that an injector might be clogged or malfunctioning. This simple test can save you time and frustration before moving on to more complex diagnostics.
Testing Fuel Injectors With a Fuel Pressure Gauge (Optional)
You can use a fuel pressure gauge to check your injectors by first setting up the gauge properly on the fuel rail. Then, measure the fuel pressure while the engine runs to see if it stays within the recommended range.
If the pressure drops or fluctuates, it could indicate a problem with your fuel injectors.
Setting Up Gauge
How exactly do you set up a fuel pressure gauge for testing your injectors? First, you need to find the Schrader valve on the fuel rail. This is where you’ll connect the gauge. Make sure the engine is off and relieve the fuel system pressure to avoid surprises.
Then, attach the gauge securely to prevent leaks. Finally, keep the gauge visible so you can monitor readings during testing.
Here’s a quick setup checklist:
- Locate the fuel rail’s Schrader valve.
- Depressurize the fuel system safely.
- Connect the fuel pressure gauge tightly.
- Position the gauge where you can easily see it.
Follow these steps carefully to ensure accurate, safe testing.
Measuring Fuel Pressure
When should you measure fuel pressure during injector testing? You should check it right after setting up your fuel pressure gauge and before activating the injectors. This ensures the fuel system maintains proper pressure and helps identify leaks or weak pumps.
Start the engine or turn the ignition on to prime the pump, then observe the gauge’s reading. Compare it to your vehicle’s specified pressure range, usually found in the service manual. Watch for steady readings; fluctuations or drops may indicate issues unrelated to the injectors themselves.
Keep in mind, measuring fuel pressure is optional but useful to confirm the fuel supply is consistent. Once pressure is verified, you can proceed to test injector spray patterns or electrical function confidently.
Diagnosing Injector Issues
Why test fuel injectors with a fuel pressure gauge? It helps you pinpoint if poor engine performance is due to injector problems or fuel delivery issues. Using the gauge, you can check if fuel pressure stays steady during operation, indicating proper injector function.
To diagnose injector issues effectively, follow these steps:
- Connect the fuel pressure gauge to the fuel rail.
- Turn the ignition on and note the pressure reading.
- Start the engine and observe if the pressure drops or fluctuates abnormally.
- Shut off the engine and see if the pressure holds steady or quickly falls.
If pressure drops rapidly, a leaking injector or faulty fuel pump might be the culprit. This test saves time and helps you avoid unnecessary part replacements.
Effective Methods to Clean Fuel Injectors
Wondering what steps you can take to restore your fuel injectors’ performance? Start by using a fuel injector cleaning kit that attaches to your fuel rail and runs a cleaning solution through the system while the engine runs. This method effectively removes deposits without removal.
You can also add fuel injector cleaner additives directly to your gas tank; these cleaners help break down buildup during regular driving. For a deeper clean, consider having your injectors professionally ultrasonic cleaned, which removes stubborn deposits by immersing them in a cleaning bath.
Remember to inspect and replace your fuel filter regularly, as a clogged filter can cause injector contamination. Following these methods helps maintain optimal injector function and improves engine efficiency without unnecessary replacements.
When to Replace Fuel Injectors Instead of Testing
Cleaning your fuel injectors can often restore their performance, but there are times when testing them isn’t enough, and replacement becomes the better option. You should consider replacing your fuel injectors if:
- They’re leaking fuel despite cleaning efforts, risking safety and efficiency.
- You notice persistent rough idling or engine misfires that testing can’t explain.
- The injectors show signs of physical damage or corrosion.
- Your vehicle’s fuel economy drops significantly, and cleaning hasn’t helped.
Ignoring these signs can lead to costly engine damage or poor performance. Remember, replacing faulty injectors ensures your engine runs smoothly and efficiently, saving you frustration and money in the long run. Don’t hesitate to swap out problematic injectors rather than wasting time testing ones beyond repair.
Frequently Asked Questions
How Do Fuel Injectors Affect Engine Performance?
Fuel injectors affect engine performance by controlling fuel delivery. If they’re clogged or leaking, you’ll notice poor fuel efficiency, rough idling, and reduced power.
Keeping them clean ensures smooth acceleration and optimal engine function.
Can Bad Fuel Damage Fuel Injectors?
Just like a bad apple spoils the bunch, bad fuel can damage your injectors by clogging or corroding them.
You’ll want to avoid contaminated fuel to keep your engine running smoothly and prevent costly repairs.
What Types of Fuel Injectors Exist?
You’ll find mechanical, electronic, and piezoelectric fuel injectors. Mechanical ones use pressure, electronic ones rely on solenoids, and piezoelectric injectors offer precise control using electric pulses.
Each type suits different engine needs and designs.
How Often Should Fuel Injectors Be Serviced?
You should service your fuel injectors every 30,000 miles, like tending a garden to keep it thriving. Regular cleaning ensures smooth fuel flow and engine health, preventing clogs and maintaining peak performance. Don’t skip it!
Are Professional Fuel Injector Tests More Accurate?
Yes, professional fuel injector tests are more accurate because they use specialized equipment to measure spray patterns and flow rates precisely. You’ll get reliable results that help diagnose issues better than DIY methods.
Conclusion
Testing your fuel injectors is like tuning a finely crafted instrument—small adjustments can bring your engine’s performance back in perfect harmony. By spotting common signs, using the right tools, and performing simple tests like checking resistance or listening for clicks, you’ll keep your injectors firing smoothly.
Remember, sometimes cleaning works wonders, but don’t hesitate to replace them if problems persist. With these steps, you’ll guarantee your engine runs as reliably as a well-oiled machine. Testing fuel injectors properly is key to maintaining your vehicle’s optimal performance.