How to Repair Cigarette Burn in Car Seat
To repair cigarette burns on your car seat, start by identifying small, circular burn holes or scorched spots. These are the typical signs of cigarette damage. Cleaning the area thoroughly is the next essential step.
Trim the burnt edges carefully with a sharp blade to create a smooth surface. Then, apply a vinyl or leather repair compound to fill the hole. Allow the compound to dry completely before proceeding.
Once dry, sand the area smooth to blend it with the surrounding upholstery. Use color-matching compounds to ensure the repair matches your seat’s original color.
For best results, use proper tools such as spatulas and gloves to maintain precision and safety during the repair process. The repair also involves texture matching and following prevention tips to keep your car’s interior looking its best.
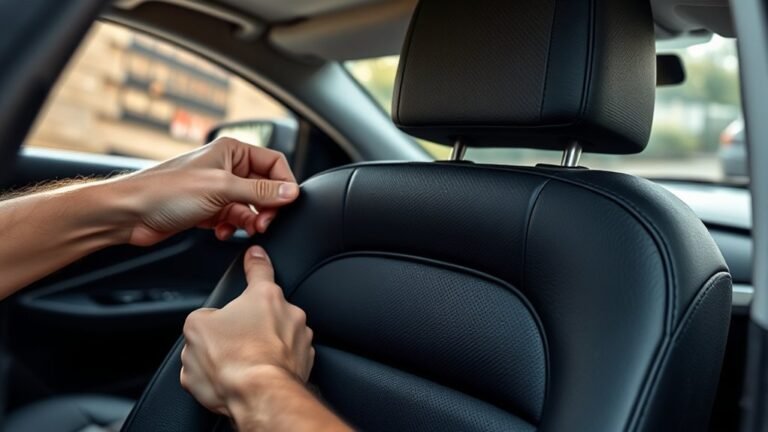
How to Identify Cigarette Burns on Your Car Seat
Cigarette burns on car seats typically appear as small, circular holes or scorched spots that disrupt the fabric or leather surface. When identifying related causes, focus on the burn pattern. Cigarette burns usually have a distinct, uniform size and slightly melted edges.
Pay attention to discoloration and texture changes around the burn, which indicate heat exposure. Accurately identifying these signs helps you assess damage severity and avoid misdiagnosing other issues like chemical stains or tears.
You should also consider legal implications; cigarette burns might affect your car’s resale value and insurance claims. Documenting the damage clearly and understanding its origin can support disputes or repair negotiations. This precise identification step sets the foundation for effective repair and informed decision-making.
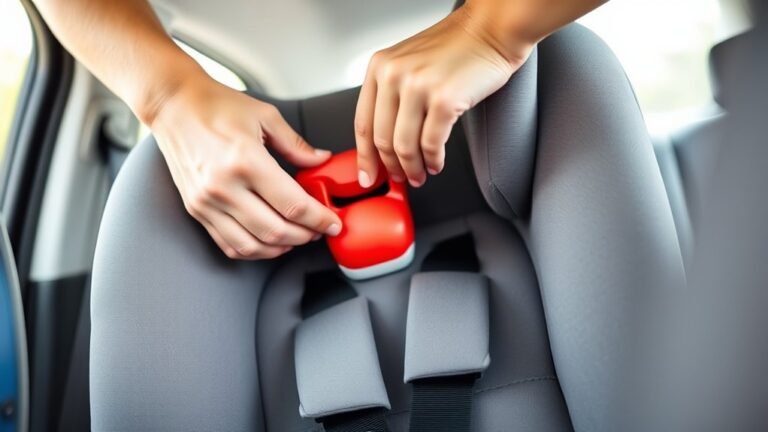
Tools and Materials You’ll Need to Fix Cigarette Burns
You’ll need a few essential tools like a sharp blade, sandpaper, and a heat source to start repairing cigarette burns. Gather recommended materials such as leather or fabric filler, colorant, and adhesive designed for car seats.
Don’t forget safety gear like gloves and a mask to protect yourself during the repair process.
Essential Repair Tools
A reliable set of tools and materials is essential to effectively repair burns on your car seat. You’ll need precision instruments like a sharp utility knife or scalpel to cleanly trim burnt edges without damaging surrounding fabric.
Fine-grit sandpaper helps smooth the repair area, ensuring an even surface for patching. Tweezers are useful for removing loose fibers or debris.
Avoid getting distracted by unrelated topics or random discussion. Focus on gathering exact tools to streamline your workflow.
A heat-resistant applicator or small spatula aids in applying repair compounds accurately. Additionally, a magnifying glass can help inspect the burn closely for a thorough fix.
Ensuring you have these essential tools ready will make your repair process efficient and professional.
Recommended Repair Materials
Which materials deliver the best results when repairing burns on car seats? Start with a high-quality leather or vinyl repair kit tailored to your seat’s upholstery type. These kits usually include adhesives, color compounds, and textured patches that restore upholstery aesthetics seamlessly.
For fabric seats, opt for matching upholstery thread and fabric patches designed to blend in. Incorporate a fine-grit sandpaper or abrasive pad to smooth burn edges before applying repair compounds.
To address odor remediation, use specialized fabric or leather deodorizers that neutralize smoke odors without damaging materials. Additionally, keep a clean microfiber cloth handy for precise application and cleanup.
Selecting these materials ensures a durable, visually consistent repair, restoring both the seat’s look and eliminating lingering cigarette odors effectively.
Safety Equipment Needed
Proper safety equipment guarantees you handle cigarette burn repairs without risking injury or further damage to the car seat. You’ll need a pair of nitrile gloves to protect your hands from adhesives and solvents.
Safety goggles are essential to shield your eyes from chemical splashes during the repair process. Use a well-ventilated area or a respirator mask to avoid inhaling fumes from glue or filler compounds.
Avoid any non relevant topic or unrelated discussion about tools; focus strictly on what’s necessary to achieve a precise repair. Additionally, keep a clean microfiber cloth handy to wipe away excess materials without scratching the seat surface.
When to Use a DIY Patch vs. Replace the Burned Section
How do you decide whether to apply a DIY patch or replace the burned section of your car seat? It depends on the burn’s size, depth, and location, as well as your car care preferences and interior design goals.
Small, superficial burns typically suit DIY patches, while larger or deep burns often require section replacement for durability and aesthetics.
| Criteria | DIY Patch | Replace Burned Section |
|---|---|---|
| Burn Size | Small (under 1 inch) | Large (over 1 inch) |
| Damage Depth | Surface-level | Deep or holes |
| Time & Cost | Quick, low cost | Longer, higher cost |
| Interior Impact | Minor texture mismatch possible | Seamless match with original |
Choose based on damage severity and desired finish to maintain your vehicle’s value and design integrity.
How to Repair Leather Car Seat Cigarette Burns
After deciding that a DIY patch suits your leather car seat’s cigarette burn, you’ll need the right materials and a careful approach to restore the surface effectively. Begin by cleaning the damaged area with leather cleaner to remove dirt and oils.
Start your DIY leather car seat repair by thoroughly cleaning the burn area to ensure effective restoration.
Trim any charred edges carefully with fine scissors. Then, apply a leather adhesive under a thin leather patch sized to cover the burn precisely. Press firmly and allow it to dry as per the product instructions.
Next, use a leather filler to level the surface, smoothing it with a spatula. Once dry, gently sand the area to blend it seamlessly. Finish by applying a color-matched leather dye and protective sealant.
Although discussion ideas often include topics unrelated to car seat burns, focus here ensures a durable, professional repair.
How to Repair Fabric Car Seat Cigarette Burns
When dealing with cigarette burns on fabric car seats, you’ll want to start by evaluating the size and depth of the damage. For small holes or singed spots, carefully trim any loose fibers around the burn.
Next, apply a fabric adhesive to a patch that matches your seat’s texture and color, pressing it firmly over the damaged area. Avoid off topic suggestions like replacing the entire seat, which is an unrelated debate and often unnecessary.
For larger burns, you may need to use a fabric repair kit containing filler compounds and dyes. Always test products on hidden areas first. After repair, let the area dry completely and gently brush the fabric to blend the patch seamlessly with the surrounding seat. This method restores both appearance and durability efficiently.
How to Repair Vinyl Car Seat Cigarette Burns
First, carefully assess the extent of the burn damage to determine the best repair approach. Next, select appropriate materials like vinyl repair kits or adhesives that match your seat’s texture and color.
Finally, follow a precise step-by-step process to restore the vinyl surface and ensure a seamless finish.
Assessing Burn Damage
How severe is the burn damage on your vinyl car seat? Evaluating burn damage accurately is essential before starting repairs. Begin by identifying the extent of the damage. Note size, depth, and whether the burn penetrates the vinyl surface or affects the padding underneath.
Use good lighting and a magnifier if needed.
| Damage Level | Characteristics |
|---|---|
| Minor | Small discoloration, no holes |
| Surface Burn | Melted vinyl, slight bubbling |
| Hole Formation | Small holes, partial padding exposure |
| Deep Burn | Large holes, exposed and damaged padding |
| Structural Damage | Frame exposure, compromised seat integrity |
This table helps you classify damage precisely, guiding your repair approach effectively. Identifying damage extent ensures you choose the right repair technique and materials later.
Choosing Repair Materials
After determining the burn damage level on your vinyl car seat, selecting appropriate repair materials becomes the next step. You’ll need a vinyl repair kit tailored to your seat’s color and texture for ideal results.
Essential components include a vinyl adhesive, a backing fabric for larger holes, and color compounds for blending. Avoid unrelated topics such as fabric repair or leather kits, as they won’t provide a durable fix.
Keep your discussion ideas focused on materials compatible with vinyl to ensure adhesion and flexibility. Also, choose tools like spatulas and heat applicators included in specialized kits rather than generic household items.
This technical precision in material selection directly influences the repair’s longevity and appearance, setting the stage for a successful restoration.
Step-by-Step Repair Process
Where do you begin when repairing cigarette burns on your vinyl car seat? Start by cleaning the damaged area thoroughly with isopropyl alcohol to remove dirt and oils.
Next, trim any loose or burnt edges carefully using fine scissors or a razor blade. Apply a vinyl repair compound with a small spatula, filling the burn hole evenly. Let it dry as per the product instructions to avoid uneven texture.
Once dry, gently sand the area with fine-grit sandpaper to smooth the surface. Finally, use a color-matching vinyl dye to blend the repaired spot seamlessly with the rest of the seat. Approaching this task is like creative writing or travel planning; you need precision, patience, and a clear plan to achieve a flawless finish.
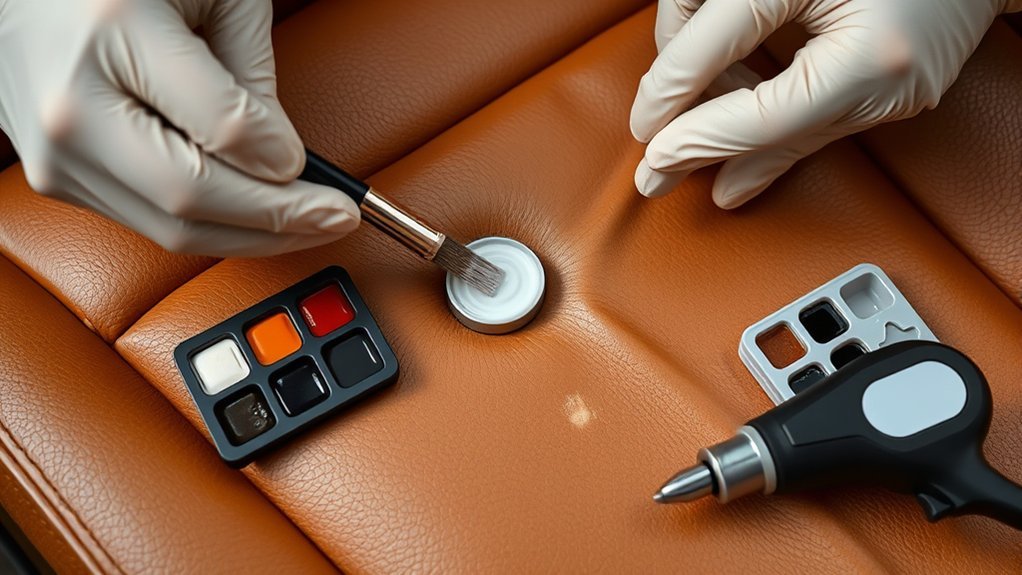
How to Match Color and Texture After a Burn Repair
Why does matching color and texture matter so much once you’ve repaired a cigarette burn in your car seat? Because the repair’s effectiveness depends on seamless integration with the surrounding material.
Start by identifying discoloration; clean the area thoroughly using appropriate cleaning techniques to avoid residue that alters color perception. Use color-matching compounds designed for automotive upholstery, testing on a hidden spot first. Texture matching requires replicating the seat’s grain pattern with specialized tools or textured pads.
| Task | Recommended Tool/Method | Key Consideration |
|---|---|---|
| Identifying discoloration | Visual inspection under natural light | Spot subtle color shifts |
| Cleaning techniques | Leather/vinyl cleaner | Remove oils and dirt |
| Color matching | Custom dye kits | Match exact shade |
| Texture replication | Textured pads | Mimic original grain |
| Final assessment | Compare repaired patch | Ensure visual consistency |
How to Prevent Cigarette Burns and Protect Your Car Seats
How can you effectively prevent cigarette burns and maintain the integrity of your car seats? Start by establishing strict no-smoking rules inside your vehicle to eliminate the primary source of burns. Use protective seat covers made from heat-resistant materials to add a barrier against accidental embers.
Regularly inspect your car seats for early signs of damage to address issues promptly. Incorporate proper car care by cleaning seats with suitable products that preserve material strength and flexibility. Avoid using scent masking sprays as a substitute for smoking outside; these only cover odors temporarily without preventing burns or residue buildup.
Finally, keep ashtrays securely placed outside the vehicle to discourage indoor smoking. Following these steps ensures your seats stay intact, minimizing repair needs and maintaining your car’s interior value.
Troubleshooting Common Problems in Car Seat Burn Repairs
When addressing cigarette burn repairs on car seats, you’ll often encounter challenges like mismatched textures, color inconsistencies, or incomplete adhesion of repair compounds. To troubleshoot effectively, follow these steps:
- Ensure quick cleaning of the burn area before starting. Dirt or oils can prevent compounds from bonding properly.
- Use color-matched repair kits and apply in thin layers to avoid noticeable texture differences.
- For odor elimination, treat the area with specialized fabric deodorizers after repair to neutralize smoke smells.
If the repair compound peels or cracks, check that the seat surface was fully dry and free of contaminants prior to application. Persistent color mismatches might require professional dyeing or multiple touch-ups. By addressing these factors, you’ll achieve a durable, seamless repair.
Frequently Asked Questions
Can Cigarette Burns Cause Harmful Fumes in My Car?
Cigarette burns themselves don’t release harmful fumes, but the cigarette stink trapped in your car seat’s damaged fibers can worsen air quality.
You’ll need effective odor removal methods to maintain a safe, fresh-smelling environment.
Are Cigarette Burn Repairs Covered by Car Insurance?
You typically won’t find cigarette burn repairs covered by insurance coverage unless you have extensive or specific interior protection.
You should check your policy, as repair costs for burns often fall under wear-and-tear exclusions.
How Long Does a Typical Repair Job Take?
You’ll find the average repair time for a cigarette burn in a car seat ranges from 30 minutes to 2 hours. How long depends on burn size, material, and repair method you choose, ensuring precise restoration.
Can Pets Cause Similar Damage to Car Seats?
Yes, pets can cause similar damage to car seats through pet scratches that puncture or tear the material.
You’ll also need to address odor concerns, which require specialized cleaning to fully eliminate.
Are There Professional Services for Cigarette Burn Repairs?
Like calling a skilled surgeon, you can trust professional repair services for cigarette burns. They provide precise fixes and offer cost estimates upfront, ensuring your car seat’s integrity is restored efficiently and transparently.
Conclusion
Repairing cigarette burns in your car seat not only restores its appearance but also maintains your vehicle’s value. Did you know that 70% of car buyers consider interior condition a top factor in purchase decisions?
By using the right tools and techniques for leather, fabric, or vinyl, you can effectively fix burns and match colors seamlessly. Timely repairs prevent further damage, ensuring your seats stay protected and looking professional for years to come.
For best results, addressing cigarette burns in your car seat promptly is essential to preserve both the look and longevity of your vehicle’s interior.