How to Remove Wheel Studs
To remove wheel studs, first park your vehicle on a flat surface, engage the parking brake, and use wheel chocks for safety. Loosen the lug nuts before safely lifting the car using the proper jack points. Then, remove the wheel to access the studs.
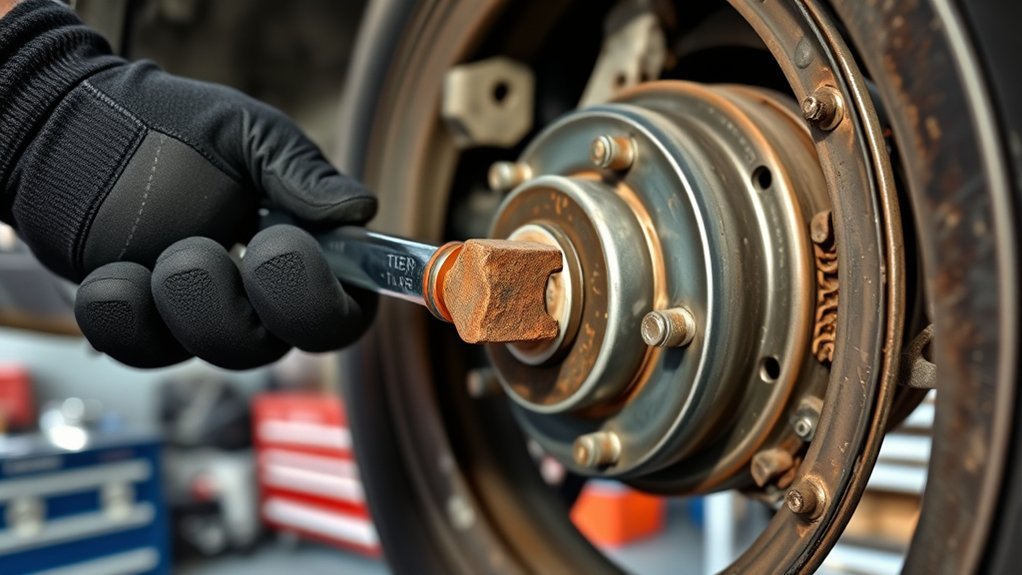
Spray penetrating oil on any stubborn studs to help loosen them. Use a punch and hammer to tap the studs out from behind, working on one stud at a time. Be careful to avoid damaging the hub during this process.
Once the studs are removed, clean the hub thoroughly before installing new studs. Keep going to uncover tips on avoiding common problems and ensuring proper installation.
Key Takeaways
- Safely lift the vehicle using proper jacking points and secure it with jack stands before removing the wheel.
- Loosen lug nuts before lifting, then fully remove them and carefully take off the wheel to expose the studs.
- Spray penetrating oil on rusty studs and let it sit for 15-20 minutes to loosen corrosion.
- Use a punch and hammer to drive each stud out from the back of the hub with controlled strikes.
- Work on one stud at a time, wearing safety glasses to protect eyes from debris during removal.
Safely Lift Your Vehicle to Remove Wheel Studs
How do you guarantee safety while lifting your vehicle to remove wheel studs? First, park on a flat, stable surface and engage the parking brake to prevent any movement. Next, place wheel chocks on the opposite wheels for added security.
Use a reliable jack designed for your vehicle’s weight, and position it at the manufacturer’s recommended lift points to avoid damage. Once lifted, securely place jack stands under sturdy frame sections. Never rely on the jack alone.
Lower the vehicle onto the stands carefully, ensuring it’s stable before you start working. Double-check stability by gently shaking the vehicle; it shouldn’t move. Taking these steps ensures you stay safe while you remove wheel studs, avoiding accidents or injury during the process.
Essential Tools for Removing Wheel Studs
Gathering the right tools makes removing wheel studs faster and safer. First, you’ll need a lug wrench or breaker bar to loosen the lug nuts securing the wheel. A hammer or mallet helps you tap out stubborn studs gently without damaging the hub.
A punch or drift pin drives the studs through the hub once loosened. You’ll also want a socket set and ratchet to remove any bolts or components obstructing access. If the studs are rusted or stuck, penetrating oil is essential to loosen them.
Finally, gloves and safety glasses protect your hands and eyes during the process. Having these tools ready ensures you can remove wheel studs efficiently while minimizing the risk of injury or damage.
Remove the Wheel to Access Studs
First, loosen the lug nuts before lifting your vehicle to keep the wheel from spinning. Use the proper jacking points to safely raise the car without causing damage.
Once elevated, remove the wheel carefully to expose the studs for easy access.
Loosen Lug Nuts
Why is it important to loosen the lug nuts before removing the wheel? If you wait until the wheel’s off, the tire will spin freely, making it nearly impossible to loosen the nuts.
By breaking them loose while the wheel is still on the ground, you use the vehicle’s weight to keep the tire stable. Use a lug wrench or breaker bar to turn each lug nut counterclockwise, applying steady force.
Don’t remove them completely yet, just loosen them enough so they can be unscrewed by hand once the wheel’s off. Loosening the lug nuts first saves effort and prevents injury.
After that, you’re ready to safely lift the vehicle and fully remove the lug nuts to take the wheel off.
Use Proper Jacking Points
Where exactly should you place your jack to lift the vehicle safely? Always consult your vehicle’s manual to find the designated jacking points. These spots are reinforced to support the car’s weight without causing damage.
Usually, they’re located just behind the front wheels or in front of the rear wheels along the frame. Avoid placing the jack under suspension components, the oil pan, or any plastic parts. Position the jack securely on a flat, stable surface to prevent slips.
Once aligned with the jacking point, pump the jack handle steadily to lift the vehicle high enough to remove the wheel. Using the proper jacking points ensures your safety and prevents costly damage, giving you safe access to the wheel studs for removal.
Remove Wheel Carefully
After safely lifting your vehicle using the proper jacking points, you’re ready to remove the wheel to access the studs. Begin by loosening the lug nuts with a lug wrench while the wheel is still slightly touching the ground for stability.
Once loosened, fully raise the vehicle so the wheel is off the ground. Carefully remove the lug nuts completely and set them aside in a safe place. Then, gently pull the wheel straight off the hub. Avoid wiggling or forcing it, as this can damage the studs or the hub.
If the wheel sticks, tap the back lightly with a rubber mallet to loosen it. After removal, place the wheel aside on a clean surface to prevent dirt or damage while you work on the studs.
How to Push Out Old Wheel Studs
Wondering how to push out old wheel studs without damaging your hub? First, make certain you have the right tools ready: a hammer, a punch or drift, and penetrating oil. Begin by spraying penetrating oil on the base of each stud to loosen rust or debris.
Then, position the punch on the back end of the stud inside the hub. Using controlled hammer strikes, drive the stud outward until it pops free from the hub.
Keep these tips in mind:
- Use steady, moderate force to avoid hub damage.
- Work on one stud at a time for better control.
- Wear safety glasses to protect your eyes from debris.
This method guarantees you remove old studs cleanly and prepare for new ones efficiently.
Inspect and Prepare the Hub for New Studs
Before installing new studs, clean the hub surface thoroughly to remove dirt and rust. Check each stud hole for damage or debris that could affect fitment.
Make sure you have all the necessary tools ready to complete the job properly.
Clean Hub Surface
How do you guarantee the new wheel studs fit securely and function properly? Start by thoroughly cleaning the hub surface. Any dirt, rust, or debris left behind can prevent the studs from seating correctly, compromising safety and performance.
Use a wire brush or sandpaper to remove stubborn corrosion and buildup. Then, wipe the area with a clean rag to clear away loose particles.
Focus on these key steps:
- Remove rust and old grease completely
- Ensure the hub surface is smooth and flat
- Use a brake cleaner or solvent for a final wipe-down
Taking the time to clean the hub surface thoroughly lays a solid foundation for installing new wheel studs that will hold tight and last longer.
Check Stud Hole Condition
Where should you focus your attention when preparing to install new wheel studs? Start by closely inspecting the stud holes in the hub. Make sure each hole is clean and free of rust, debris, or damage.
Use a wire brush or compressed air to clear out any buildup that could prevent the new studs from seating properly. Check the holes for any signs of elongation or cracking, as damaged holes can compromise stud security.
If you spot corrosion or rough edges, smooth them carefully with a file to ensure a snug fit. Properly prepared holes help the studs align correctly and maintain wheel safety. Taking these steps now saves you from potential issues later when mounting the wheel and driving.
Gather Necessary Tools
After ensuring the stud holes are clean and free of damage, you’ll want to gather the right tools to remove the old studs and prepare the hub for the new ones. Having everything on hand will make the process smoother and safer.
Here are the essentials you’ll need:
Hammer or mallet: To tap out the old studs carefully without damaging the hub.
Stud installer or lug nut: For pulling the new studs into place securely.
Socket set and breaker bar: To remove and tighten nuts, and provide the torque needed for stubborn studs.
Make sure your tools are in good condition and fit the specific sizes for your vehicle. Preparing properly saves time and prevents damage while replacing wheel studs.
Install Replacement Wheel Studs Correctly
Why is it essential to install replacement wheel studs correctly? Proper installation ensures your wheels stay securely attached, preventing accidents and maintaining vehicle safety.
Properly installing replacement wheel studs keeps your wheels secure, preventing accidents and ensuring vehicle safety.
Start by cleaning the hub and stud holes to remove debris or rust, ensuring a snug fit. Insert the new stud from the back of the hub, pushing it through until the threaded end is visible.
Use a lug nut and washers to pull the stud fully into place, tightening the nut gradually to seat the stud properly without damaging threads. Avoid hitting the stud with a hammer, which can weaken it.
Once installed, check that the stud is flush and secure. Proper installation helps maintain wheel balance, avoids premature stud failure, and keeps your driving safe.
Fix Common Problems Removing Wheel Studs
Properly installing replacement wheel studs starts with successfully removing the old ones, but you might run into some common problems during removal. If a stud is stuck, rust or corrosion is usually the culprit.
You can try these solutions to fix typical issues:
- Apply penetrating oil: Spray it around the stud base and let it sit for 15-20 minutes to loosen rust.
- Use a hammer carefully: Tap the stud from behind to break it free, but avoid damaging the hub.
- Heat the area: Use a heat gun or torch to expand the metal slightly, making removal easier.
Taking these steps should help you remove stubborn wheel studs without causing damage or frustration.
Frequently Asked Questions
What Causes Wheel Studs to Wear Out Prematurely?
You cause wheel studs to wear out prematurely by over-tightening lug nuts, driving on damaged studs, or neglecting regular maintenance.
Corrosion and using the wrong tools also weaken them, so be careful and check them often.
Can I Use Different Sized Wheel Studs on My Vehicle?
You might be tempted, but using different sized wheel studs isn’t safe. Mixing sizes can cause uneven stress, risking wheel failure.
Stick to the manufacturer’s specs to keep your ride secure and avoid costly mistakes.
How Often Should Wheel Studs Be Inspected or Replaced?
You should inspect your wheel studs every time you change tires or notice vibration. Replace them if they’re bent, cracked, or stripped.
Regular checks help keep your wheels secure and prevent accidents on the road.
Are There Any Safety Risks Using Aftermarket Wheel Studs?
Imagine your wheels gripping the road like a handshake. If you use aftermarket wheel studs, you risk a loose grip, causing vibrations or worse. Always choose quality studs to keep your ride safe and steady.
What Torque Specifications Are Recommended for Tightening Wheel Nuts?
You’ll typically tighten wheel nuts to around 80-100 ft-lbs, but always check your vehicle’s manual. Using a torque wrench guarantees proper tightness, preventing damage or loosening while you drive safely.
Conclusion
Removing wheel studs is like untangling a stubborn knot—frustrating at first, but rewarding once you master the technique.
Remember, just like one mechanic found success by carefully lifting his vehicle and using the right tools, you’ll avoid damage and speed up the process.
With patience and proper steps, you’ll have those studs out and new ones in, ensuring your wheels stay secure and your drive stays smooth.
Keep at it—you’ve got this! Removing wheel studs correctly is key to maintaining vehicle safety and performance.